Water-cooling is becoming a common thing among users today, even though there are many who are concerned about putting water together with electronics. For those who do not dare, or cannot, build their own system there is quite a number of different types to choose between, and today we will have a look at an external one. It is called Corsair HydroCool 200 and, except for the water block, which naturally is placed on the inside of the computer, it is external. What makes this product even more interesting is the interface card that controls the cooling and also monitors the temperatures. What this thing can accomplish we are about to tell you, but first some specifications.
Water-cooling is becoming a common thing among users today, even though there are many who are concerned about putting water together with electronics. For those who do not dare, or cannot, build their own system there is quite a number of different types to choose between, and today we will have a look at an external one. It is called Corsair HydroCool 200 and, except for the water block, which naturally is placed on the inside of the computer, it is external. What makes this product even more interesting is the interface card that controls the cooling and also monitors the temperatures. What this thing can accomplish we are about to tell you, but first some specifications.
|
Water block
|
|
|
Material
|
Copper
|
| Inner construction |
Many small sticks
|
| Nipple size |
3/8″ (OD)
|
| Dimensions (WxDxH) |
51x51x7 mm
|
|
Other
|
Built-in Temperature
|
|
Radiator
|
|
| Construction |
Thin channels
|
| Nipple size |
3/8″ (OD)
|
|
Fan
|
|
| Label |
AVC
|
| Dimensions |
120X120X38 mm
|
| CFM |
115
|
| Noise level |
45dBA
|
|
Pump
|
|
| Label |
Bosch
|
| Flow |
600 LPH
|
| Noise level |
–
|
Corsair Hydrocool is an extreme water cooling system made for the average user as well as for hobby overclockers. The water block is exceptionally small; a height of only 7 mm gives almost no margins if the pump would have a breakdown. There is a tiny temperature sensor on top of the block, which is connected to big LED displays on the front of the cooling unit. We estimate that it shows 15 degrees lower than the actual CPU temperature.
The pump comes from Bosch whom are more known for their drilling machines. Any exact specifications were not available but approximately the flow is 600 Litres per hour. The radiator is unmarked, but is the kind that is found on for instance Black Ice with many thin water pipes instead of a few thick ones, which results in better performance. The fan comes from AVC and is a real monster, and the cooling unit itself is 160x358x168 mm. The system requires at most 1.5 A on +12 V and 0.25 A on +5 V, which most PSU’s should be able to handle.
| Accessories/Features |
The guys at Corsair are not cheap on accessories. Besides the water block and the cooling unit, this is included: one XM hose, one interface card, one AMD mounting kit, one P4 mounting kit, one cooling paste, one 15-pin D-Sub cable, one Power-On splitter, one Molex extension cable, two angled fast connectors, four metal hose clamps, two plastic hose clamps, one 0.3 Litre bottle with corrosion preventing agent, one hopper, one manual in both English and German and finally a Quick Installation Guide. More than that is not necessary, they got it all included.
The hose may be a little short depending on where you want the cooling unit, but right next to the computer is no problem. The Power-On splitter is needed to make the cooling unit to start at the same time as the computer, and the D-Sub cable transfers data between the cooling unit and the computer.
|
|
|
The included bottle of liquid is enough for two fillings. Now you think “What? How am I going to take the computer somewhere?”. Luckily Corsair thought of that and the whole system is equipped with fast connectors that simply shut off the water when they are unplugged. Then it is just to go wherever you want are plug it back. A few drops but not much. The manual is detailed and shows exactly how to set up and configure the system, and the only things missing are specifications.
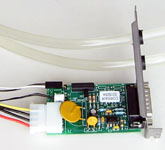
The interface card contains the electronics for the cooling unit, and is the most interesting part of the package. It serves as input for the hoses, a very clever solution as they have to come in somewhere. The interface card also has a lot of circuits, which are meant for more than just delivering power and tell the temperature with big figures on the front. It has a Turbo-mode that makes the fan go at maximum speed. This can be controlled manually by a switch in the front but is also turned on automatically when the temperature sensor reaches 40 degrees, and is turned off when temperature is less than 38.5.
The speed of the fan is varying according to the graph below. If the temperature rises above a certain level (45 is default) the unit will start making a terrible noise, and if 50 degrees is reached the computer will be turned off. These two temperature levels are adjustable if they do not suit your needs. There is another alarm that will makes itself audible whenever the water level is too low, and the display will show the text “FILL”. The only thing that is missing is an adjustable temperature/air flow-curve, but that is not a very big deal as the default one works fine.
Everything you need is included, and except for an adjustable temperature/air flow-curve there is nothing else I can think of that I would like to have. The grade will be 9.5.
|
Accessories / Features
|
||
| We look at the amount and usefulness of included accessories and integrated features. |
|
|
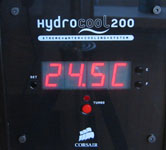
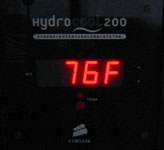
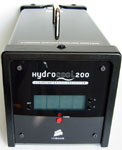
The point of using HydroCool is that you won’t have to cut or make a fuss with your chassis to get water cooling, and the constructers have really done a fine job in making this possible. The whole system is built inside a relativily small box which is set next to the computer. The front of the system is decorated with four big red 7-segment LED displays, a red light-emitting diode and four buttons. The LED displays are used mostly to show the temperature with a resolution of 0.5 degrees centigrades, but also for some important messages, for example when you have to fill the system or when some alarm has been set off. Two of the buttons are used to choose if you want to see the temperature in centigrades or fahrenheit, a simple but oh such an useful function. The button below the display turns on and off the turbo mode of the fan, and the red light-emitting diode indicates if turbo is on or off. The last button is used to set different values in the system, and also for using “Diagnostic Mode”, where you can test if differnet functions are working properly.
|
|
|
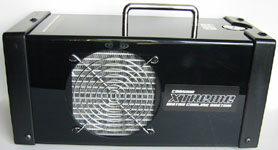
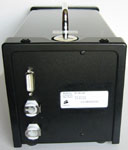
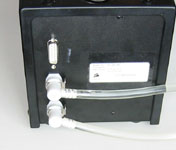
The cooling unit is built of dark half transparent hard plastics, which have been bent to fit properly. The joints in the front and back are covered by large black plastic lists, which have been screwed on with regular screws. When the system is running, a small white light bulb inside shines directly on a flow indicator, which enables the user to check that water is in fact being pumped through the system. It’s funny that they didn’t use high intensity light-emitting diodes, since they last much longer. The box is decorated with Corsair’s logo here and there, the nice ship can only be found on the front of the unit. The sides and the top have stickers marked “Corsiar Xtreme Water Cooling System”. On the upper side we find a handle, which has been placed in the box’s centre of gravity. This makes it remarkably easy to carry. The longer sides have one 120 mm hole each with a regular fan grating on the side. These are of course intended for the fan which is placed on the radiator. On the backside we find all connections, a D subconnection and two hose connections with fast attachment, which we decribed earlier.
|
|
|
|
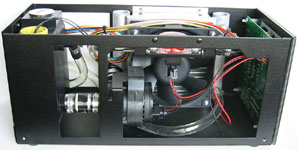
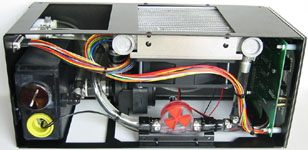
After the shell was removed with some effort, the intestins were clearly visable. The system consists of a pump, a radiator, a fan, a tank and some electronics. The fan is thicker than the usual 120mm, this of course gives a more powerful flow of air. It is of the brand AVC, the exact model number is B1238B12H. The sound level is measured to 45dBA and it pushes 115CFM, a real heavy-weighter, that is. Fortunately it can run at a slower rate, the sound only becomes annoying during turbo mode. During regular usage, it is somewhat louder than a regular CPU fan, but not much. The pump makes some noice, the sound is at about the same level as that of the fan although somewhat more pleasant. This is probably caused by the fact that the pump is hanging from a rubber bulk which effectively reduces just about all vibrations coming from it, stopping the vibrations from traveling to the rest of the cooling unit.
|
|
|
There isn’t much to say about user friendliness, all there is to it is starting the system and everything else is handled automatically; the temperature is under surveillance (also automatically) with the help of the interface card, so that’s nothing to worry about. The design is very nice, the half-reflecting black transperant surface clearly makes an impressive impression. When it comes to the functional design, it was a bit tough to pick the system apart, but the unit has no real need to be service friendly, since the system is fully functional from the start.
It is very easy to carry the unit, the only thing I have to complain about is the commercial tags which are placed just about everywhere and also the sound of the pump.
|
Design/User friendliness/Sound level
|
||
| We take a look at the aesthetical and functional design of the water cooling. User friendliness and sound level are also considered factors when determining the grade. |
|
|
| Price/Accessibility |
The product can only be found at one retailer in Sweden: komplett.se. The price is about 2700 SEK, whether that’s cheap or not is difficult to say. It is 500-1000 SEK more expensive than other complete water cooling kits which are mounted into the computer, but when it comes to external water coolings this unit is offered for a pretty decent price. If you for example compare with Koolance EXOS system, then Corsair is actually about ca 500 SEK cheaper, so the price is a matter of interpretation. Accessibility is a problem, but the unit is likely to appear at more and more places, since it is relatively new.
|
Price/Accessibility
|
||
| We compare price with equal products and also accessibility among Swedish retailers. |
|
|
The manual has an excellent installation guide , but for those of you who havn’t got the manual – here is my personal installation guide. Note that I won’t bring up everything in the same order as in the original manual, this is the way I did it.
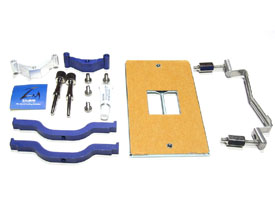
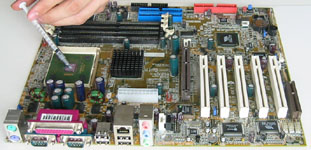
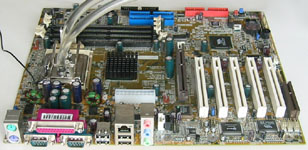
Start by cleaning the processor of all cooling pasta, and apply some new. Entire pages could be written only about applying cooling pasta, but continue to add until it has got about the same thickness as a grain of rice. It should be just about right. Then put the waterblock there so that the clip can easily be mounted, it is supposed to be in the slot in the middle of the waterblock. Fix it to one of the sides in the socket, and push until the other side has been pushed in properly. It’s pretty easy to get the clips on, but a solution which uses the four holes had been more comfortable. The hoses are already fixed to the block by hose clips, so there’s no need to do anything more with those.
|
|
|
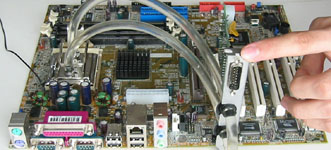
Now it is time to mount the interface card, start by pulling the hoses through the holes. Then screw the card until it’s fixed to an empty PCI spot at an appropriate distance from Power-On, the networks unit and the water block. After that the rest is supposed to be connected, put in the Molex extensioner and connect it to the networks unit. Then connect the enclosed power-on cable, applying it to the spot for J5. The temperature sensor from the water block should then be connected to J3. Now the interface card is properly installed and the only thing that remains is connecting the system to the cooling unit.
|
|
|
Cut off the hoses to a better length and mount the fast connections. A word of warning is that the hose connections are stuck really, really hard after the mounting, you’ll have to cut them off the hose to get them off.
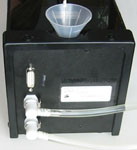
After that you’ll just have to put in the connections on the back of the cooling unit, which hose you apply in what socket matters less. Then use the enlosed funnel to fill with liquid. Don’t forget to mix with the enclosed liquid. The last thing to do now is connect the D sub contact between the interface card and the cooling unit, and then you’ve finnished.
Turn on the unit and hear it whine like mad. The low water level alarm will go off directly when you turn on the unit, and when the water get’s pumped out in hoses and block, the water level decreaces greatly. Fill until the whining stops and then a little bit more. Screw on the lid, and incline the cooling unit to get rid of those air bubbles. When this is done, fill some more liquid for the last time, screw the lid tight, lean back and enjoy the wonders of water cooling.
|
|
|
The installation leaves nothing more to be wished for except installation of the water block. If it wouldn’t be for the somewhat poor mounting device which seem to have a really good appetite for thumbs, this would be an almost perfect installation, the hose connections make it just wonderful to pick apart and put together the system.
The only problem is when you want to disconnect the hose connections, which doen’t happen very often.
|
Mounting/Installation
|
||
| Here we take a look at how easily the unit is mounted and installed, as well as compatibility programs and other eventual problems which may arise. |
|
|
|
Test setup
|
|
|
Hardware
|
|
| Processor: |
XP1700+
|
| Mother board: |
Abit NF7-S 2.0
|
|
Software
|
|
|
Temperature measurer:
|
MotherBoard Monitor 5.2.2.0
|
|
Definitions
|
|
|
Idle:
|
1 hour with all processes shut down, except for the necessary
|
| Load: |
Temperature after 2 hours with Prime95
|
The temperatures were measured both with and without turbo mode. The temperatures are also divided in two graphs, one with overclocking and one without. The turbo mode gave the same idle temperatures, which indicates that the water temperature already is ok.
I have no actual reference for the temperatures, but my home-made water cooling system built of an Eheim 1048, an o4p copper block and a Black Ice 2 is 3-4 degrees below the system no matter what value you are looking at. The results are very good for a pre-built system, and as the turbo mode does not help the bottleneck seems to be the block or the water flow. Personally I suggest the water block, as its surface simply is too small to compete with the giants.
Because of problems with the test setup we could not test overclocking this time, but there will be an update in a near future. I put the grade in brackets, but will be counted in the final mark, as it is an approximate estimation.
|
Performance/Overclocking
|
||
| We look at what temperature the water cooling system manages to keep under different circumstances. |
|
|
With HydroCool 200 Corsair showed what they have got, it is a genuine product with a very few flaws. Easy to install, easy to remove, good performance, nice design and multistage alarm at abnormal temperatures are only a few of the positive characteristics this system has. The lack of references makes it quite hard to judge the performance, but there will be an update shortly. The water block the only subject of alteration, as it is an obvious bottleneck in a system with great potentials. For all those who want water cooling but not really dare to build their own, or do not want to mod their case I strongly recommend this system. The price is higher than other water cooling systems but the liberty of having an external box cost.
|
Pros:
+ Everything you need is included, and even more + Easy to take with you + Multistage alarm Cons: |
|
| Accessories/Features |
9.5
|
| Design/Userfriendlyness/Noise level |
8.5
|
| Price/Availability |
9.0
|
| Mounting/installation |
9.0
|
| Performance/Overclocking |
7.5
|
| Final mark: |
|
Thanks to Corsair who made this review possible


