What to do when the summer is about to come to an end and bike sits untouched in the garage? Time to grab the Dremel multitool and the plexiglas and send the girlfriend off to a spa!
My yearly vacation was ending and the motorcycle was in the garage because of bad weather. Like many other days of my vacation, I was sitting in my sofa watching a movie, something my partner didn’t like very much. I started thinking about changing that boring computer that stood beside the TV and I wanted something that would be visible.
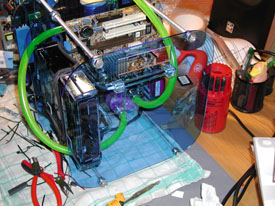
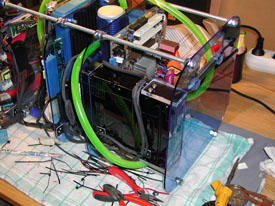
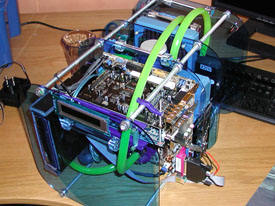
Ever since the day I removed the disco ball I’ve had an inner longing to be the king of the dance floor and if you can’t do it physically, you have to come up with something else. I made a few fast sketches inside my head and came to the conclusion that the computer would be built with slightly blue tinted plexiglas. The plexiglas would be kept together with screws and bolts that run all the way through the case. Because I wanted it to be visible, I made it an open case, in other words completely without sides and of course it had to be water cooled.
I was already using Microsoft Windows XP Media Center 2005 and I wasn’t about to change that, but I wanted it to be more like some of the commercial products that exists. The answer was to mount a display in the front of the case that shows what movie you’re watching or what music you’re playing.
|
|
I already had most of the computer parts, but I was forced to order lights, water-cooling and other stuff. Fortunately I don’t live far from Clas Ohlson, and I had to take a few trips there while I was building the case.
As usual I have to warn you about working with machines and tools that can be hazardous if they are used the wrong way. Make sure you always use protective gear, like gloves, eye protective goggles and so on. Also, neighbors don’t appreciate loud noises after 22:00 pm, especially if you live in an apartment.
NordicHardware or any of its crew can’t be hold responsible for any damage to you or your property for any acts described in this article.
It varies a lot when it comes to specifications for computers running Windows XP Media Center 2005, at least when it concerns the harddrive size and so on. It’s not as usual today, to build a computer of your own with this operating system, partly because of the license rules and partly because it isn’t yet available in Swedish.
Anyhow, I have made a list of what I have in my computer. Notice that I have another computer with a TV-card because it wouldn’t fit in this case, even though I don’t normally use this function. I also have a USB-version that I can connect to this computer if I have to.
|
MjO Media Center 2005
|
|
|
|
|
| Operating system | Windows XP Media Center 2005 |
| Remote | Microsoft Media Center |
| Mainboard | Asus K8S-MX, socket 754, M-ATX |
| Processor | AMD Athlon64 3400+, socket 754 |
| Memory | TwinMos 1 GB DDR, 2×512 PC3200 |
| Harddrive | Seagate Baracuda 200 GB, S-ATA |
| Optical unit | NEC DVD+/-RW ND-3520A |
| Video card | NVIDIA FX-5700, 256 MB, AGP |
| Sound card | Sound Blaster X-Fi Extreme Music |
| Power supply | Dign Animo HTPC, 320 watt, silent |
| Lighting | 2 Cold Cathode, blue, 10 centimeters 2 Cold Cathode, UV, 10 centimeters |
| LCD-Display | OLED 2×20, green text, black background |
| Controllers | Velleman radio transmitter Velleman radio receiver Sunbeam light controller (reacts to sound) |
| Water pump | AquaComputer Eheim 1046, 12 volt |
| Water block | Zalman ZM-WB2 GOLD |
| Radiator | Black Ice Extreme |
| Fans | Papst 120 millimeter |
| TV-card | Hauppauge (WinTV-PVR-250) |
| Other | Rund ATA133-kabel, UV-reactive S-ATA-kabel, UV-reactive Zalman ZM80D-HP, Video card cooler Connectors for PSU, UV-reactive Revoltec heatsinks for the memories Hoses and hose clamps Loads of screws and superepoxy UV-reactive fluid for the water cooling |
Most parts used in this computer are standard components, which is to say they have not been specially manufactured in any way. That said, I can tell you that almost every part will in some way be modified to fit in with the concept.
I have some requirements for my computers, first and foremost that they work satisfyingly without crashing or such. A computer that crashes in my house will thrown out through the window very quickly, I can tell you that. The second requirement is that it has to be quiet, or at least quiet enough not to disturb. This is definitely a must for a computer that is going to stand in the living room and be used to watch movies.
Almost every component will be more or less modified to fit in aesthetically.
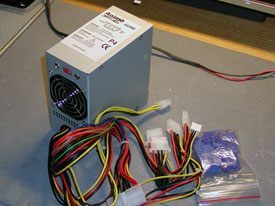
The first component I started looking for was the power supply. This is a critical component, partly because it has to perform well and partly because it has to be quiet.Even if you exchange other components and fans, and try to get a silent computer, chances are the PSU will still have fans in it. These days there are power supply units with water cooling, but they are still very expensive. There are also completely passive PSUs, but these are in general larger than the one I picked, they require certain ventilation and produce a lot more heat. They also cost a small fortune.
I chose a PSU for a HTPC case, which is a case specially designed to be used for a computer in the living room. The product ah advanced controlling of the fans depending on load and temperature, and hopefully it will be quiet enough for me.
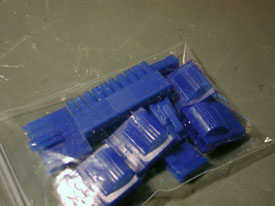
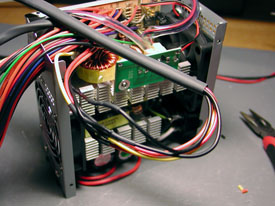
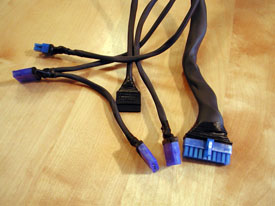
The PSU itself was quite boring, however, so I bought replacement connectors that react to UV light to make it a bit cooler.
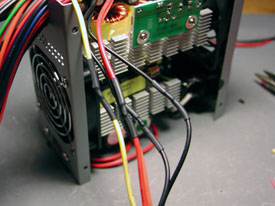
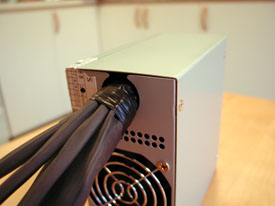
Apart from the connectors, I had decided to put heat-shrink tubing on the power cables in order for them to look better and be easier to handle.
Most connectors and cables attached to the PSU were modded with ease. These include the regular connections for supplying power to drives, with the exception of the new connectors for hard drives with serial-ATA. The connector itself was molded, and could not be removed from the cable. I had to simply cut the cables, solder them together again and isolate with heat-shrink tubing.
If you attempt this yourself, make sure to solder the right cables together.
The ATX connector that connects to the mainboard was very difficult to replace. It has a lot of cables and the small pins are very firmly attached. The only way to remove them is with a small needle, unless you have the appropriate tool. When it all was done I finished the ends with some vulcanizing rubber tape.
This is a good method if you do not like to use regular tape which comes loose and leaves sticky glue when it heats up. The vulcanizing tape turns into a single piece of rubber when tempered.
Since I want the computer to be as quiet as possible, it needs good cooling on all components without affecting the noise level. This is solved by installing passive cooling devices on the components in the computer where it is possible.
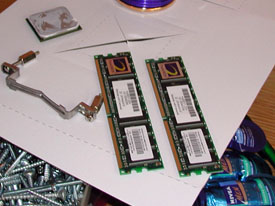
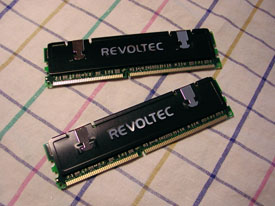
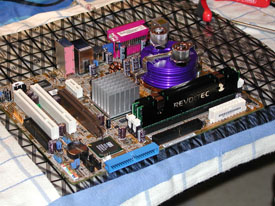
I chose to attach heat sinks to the memory modules in order to better spread the heat and remove it from the circuits. The heat sinks consist of two aluminum sides (there are heat sinks made out of copper as well) that are mounted on the memory module with double-sided adhesives. They are then secured by two metal clips.
I also think that they enhance the looks of the memory modules, as well as keeping the memory more stable, especially in a case where there will be very few fans.
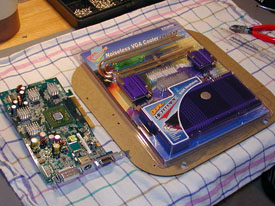
If you want to, you can connect the water cooling system to the video card as well, but I have chosen not to do that in this computer. The main reason is that it is not necessary, since I will not be playing any games or performing any other demanding tasks. Another reason is that the video card can manage with passive cooling and I do not want to burden the water cooling system more than necessary, so that I can keep the radiator fan spinning as slowly as possible.
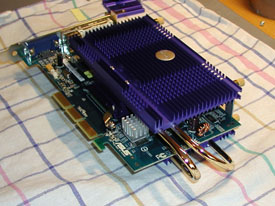
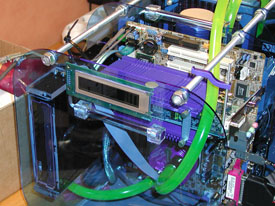
Zalman makes a passive heat sink for video card, which is the one you can see in the pictures above. The heat sink is very large and heavy, so it is important to be careful when using it, especially if the card is to be mounted in a home made case such as this one. You will see further on that I had to secure the card to keep it from breaking.
In the package are included two large heat sinks that are mounted on the front and back side of the card together with two heat pipes spreading the heat between them. There are also heat sinks for the memory circuits which are mounted with double sided tape (included). Remember to check whether your particular video card is compatible with this heat sink, regarding both how powerful it is and if it will fit in your computer case at all.
You will of course need an optical unit if you want to use Media Center 2005. With that said I recommend installing a DVD-burner, since you then can take advantage of being able to play movies, but also record and burn movies TV-shows.
I thought long and hard before I decided where to put the DVD-burner. Since the case is built from four sheets of plexiglas and will stand with the narrow end forward the unit has to be mounted through several sheets to look good. My solution was to mount it standing on the side against the front sheet of plexiglas.
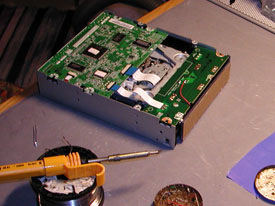
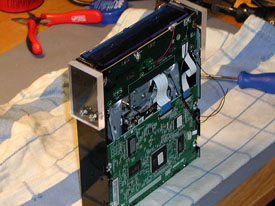
My first task was to measure where to put the holes and cut these out and polish the edges. Then I had to disassemble it and remove the front, since I don’t want it to show. I cut out a smaller hole in the front sheet, which the sled can slide through. A hatch was made and mounted on the unit with epoxy glue. This will make the units hatch to melt in with the front plexiglas and when you open the unit the sled will look like coming out of thin air.
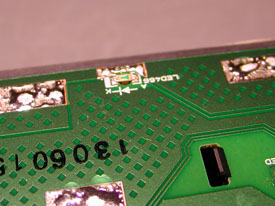
When I had decided for what color theme I wanted use I couldn’t use certain diodes and this of course applies to the DVD-burner as well. The small diode therefore had to be removed and switched to a blue one. I didn’t have any of the same type so I had to use a regular one and mount it on the bottom of the unit, so you could see the LED through the front plexiglas.
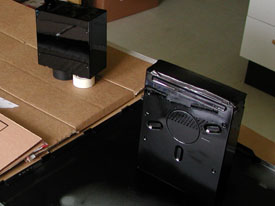
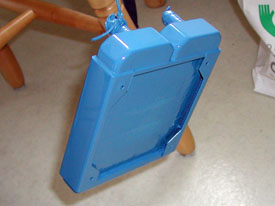
The next step was to paint the units as the case is built from plexiglas and there won’t be covering the components. At such conditions it is important to keep the inside clean and organized. The DVD-burner and the power supply was therefore pained black with a high quality polish. All water cooling components was painted blue with the same type of polish (pictures can be found later in the article).
Small brackets of plexiglas was made and screwed onto the DVD-burner. These brackets will then be glued with epoxy on to the front sheet. This makes it possible to remove the unit if you want, which wouldn’t be possible otherwise. The rear of the unit will rest on the hole in sheet number two .
Since I have completely removed the front I had to solve the problem with the button that opens the unit and sends out the sled. The solution had to be a discrete at the back of the case that opens and closes the hatch. The placement makes the case a bit cooler as you won’t see the hatch or button on the front and you get a good laugh when your family and friends tries to find the button for the DVD.
Like always when building something, it’s very important to carefully measure to make sure everything fits where it’s supposed to fit. Mounting a prototype before assembling the final product is preferably, not just drilling the holes and filing the edges. Very often the holes get smaller than the markings and the final product might be very poorly assembled or the pieces won’t fit at all.
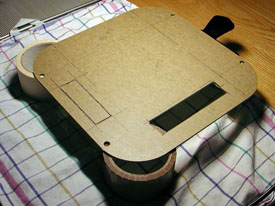
I started by marking out the holes for the rods on the four sheets of plexi. First, carefully mark out the holes and then put all the sheets together and drill through all of them at once. Using a center punch is very recommended, because it’s very easy for the drill to wander before it starts to cut if you try drilling without a punch-mark, resulting in misplaced holes. Keep in mind that you should drill slowly and with a sharp drill, when going too fast with a dull drill the plexi is very easily cracked.
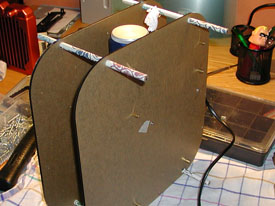
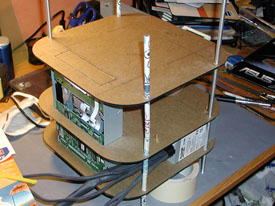
When the holes were done I wanted to fit the sheets and measure the distance between them and such. For this, I borrowed a few flowery pencils from my girlfriend that were perfect for holding up the sheets while measuring. I also marked out the DVD burner and the display hole on the front, these were later cut out with a multi tool and the edges were finished off with a file.
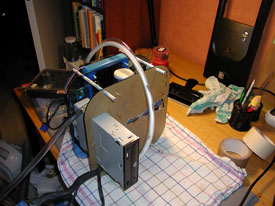
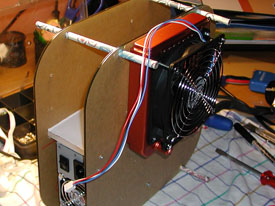
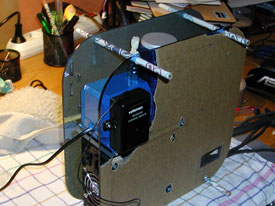
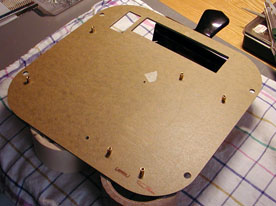
The next step was test mounting the radiator to see if it would fit, for you see, the pump and the PSU is going to be screwed to the board on the other side. The pump is to be fastened on a thicker piece plexi sheet that I cut out.
The DVD burner will, as I said earlier, be mounted through multiple sheets, or more exactly, through sheet number two, which is attached to sheet number one. I had to test mount this one too to see how much space it took up along with making sure that it would slide through the hole, that I made, easily. It’s also very important that everything is straight when this test mounting takes place.
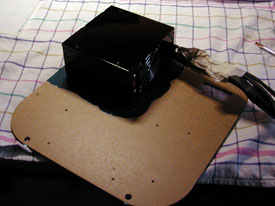
The painted PSU was screwed directly to the plexi sheet, with longer screws that attach the lid. As you can see, all the holes are there, the case is built and the sheets preparing is done.
I also fitted the radio receiver, which will make sure you can communicate with the box from a distance. This radio control will be used controlling the power button on the computer, making large movements futile. The radio control will actually be the only thing that can start up the computer
Some might think that water doesn’t go well together with computer, but I say it’s quite the contrary. Today we have big problems caused by all the heat coming from the high performing computers and components. The natural step from air cooling to water cooling hasn’t been made in personal computers, mainly because it’s relatively expensive today, but also because the home user isn’t, practically, prepared for it
Some of you might think that water cooling is “slushy” and that you keep water in your computer, but it’s not really that simple. The basics of water cooling is this; the water goes through the water block, which sits on top of the CPU like a regular heat sink, taking the heat with itself as it heads towards the radiator, where the water gets cooled down, resulting in cooling of the CPU.
Like I said above, the hot water is pumped or led away from the CPU to the radiator, the radiator’s assignment is cooling the water. The radiator’s got several, very small pipes, which are then connected to several small heat sinks. These heat sinks are cooled by air passing through the radiator. This makes the outgoing water cooler than the incoming.
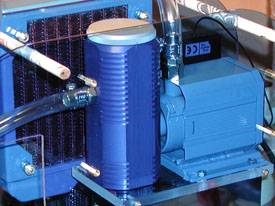
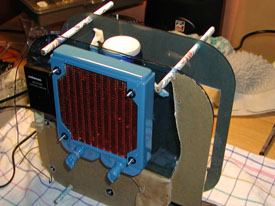
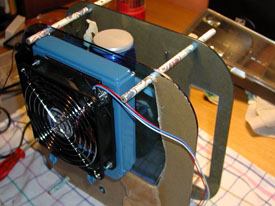
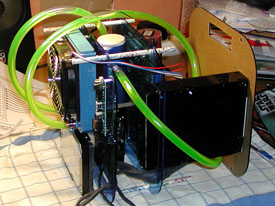
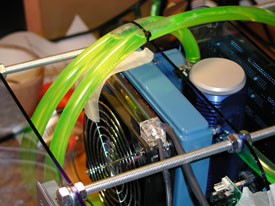
On the pictures above, you can see a special made radiator for water cooling a computer. But the function works exactly like, for example, a radiator in a regular car. To achieve the best effect and thermal conductivity from water to metal, the radiator’s been made out of copper.
A fan is attached to the rear side of the radiator to vent it and cool down the water. Now you might wonder what good switching a fan with another is. But the fan I use for cooling the radiator is very large and has got a low RPM value, making it nearly noiseless. Fortunately water cooling doesn’t need as much airflow as air cooling.
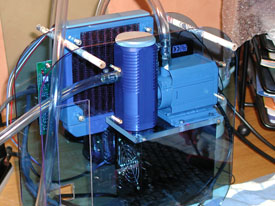
The right picture displays the pump along with the bundled reservoir. Its assignment is to pump the water around the water cooling system. It’s also a special version, designed for 12 volts, making it possible to use the computers PSU as the power supply. The reservoir is used for filling the system with water and also for removing all the air that might exist in the system.
This is a closed system, meaning that the water will never have any direct contact with the electronics, you will never have to add addition water nor empty the system. There’s also electronics monitoring and shutting of the computer in case the pump would dysfunction.
Time to put together the computer, or put the components into the box and then putting together the box itself.
Remember to always use caution when dealing with the components especially if they’re sensitive to static electricity.
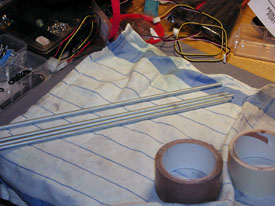
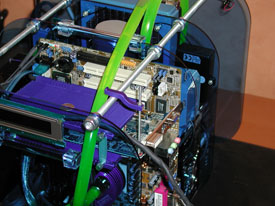
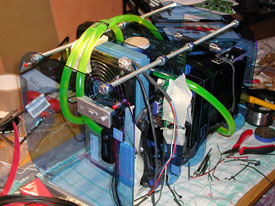
I’ve decided to put togheter the box using four thread poles of the size M8. You also need a bunch of washers and nuts that are also size M8. You can find this at any other well-assorted hardware store.
Since i bought long poles i had to cut them into suitable lenghts. Keep in mind not to do this before you’ve decided how deep you want your box to be. Since you can’t adjust them very much after you’ve cut them.
Take out the mainboard and attach the RAM and any other components before putting it into the box. The reason we’re doing this is because it’s not
good to press to hard against a mainboard that’s attached with little screws and we all know that some memorycircuits doesn’t fit in the socket without a little violence.
I have chosen to use regular screws to attach the mainboard, I.e. the kind you will find inside a regular case. Attach them to the plexiglas and make sure to fasten them real good. Time to remove the protecting plastic.
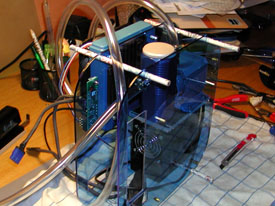
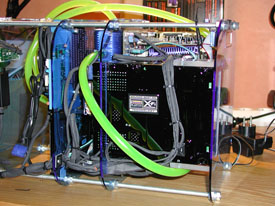
I chose to put together glas number two and three first as thy keep the pump at place. The power supply is also attached to the third glas, which will make the contruction more stable. Make sure to notice the flowery pens that acts as temporary support.
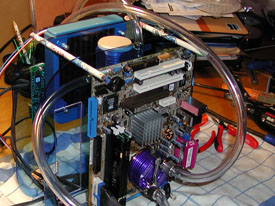
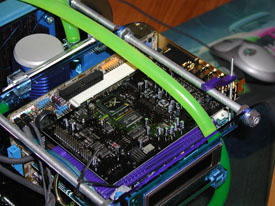
The we have the mainboard and I chose to attach it to the second sheet of plexiglas with regular screws. The waterblock is attached to the processor and the hoses was connected in the correct order.
Remember the order the components are connected and that the flow is in the correct direction. You should always have to water flow from the radiator (cold water) to the CPU, to the pump and then the reservoir and back to the radiator (warm water). If you have more components you always have the processor first and then on to video card and/ or mainboard chipset.
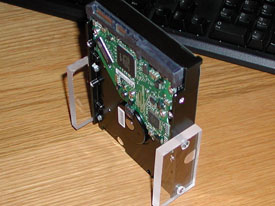
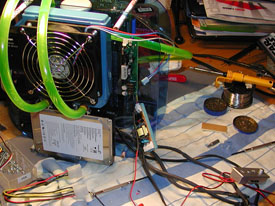
The harddrive was mounted on to sheet number three, against the floor. I cut of two pieces of plexiglas which I attached to the harddrive and will glue to the third piece of plexiglas.
As you can see on the picture to the left that the harddrive has now been glued to the plexiglas, but you can still remove it as it is screwed to the small pieces.
I have now filled the system with fluid and made sure it isn’t leaking anywhere. You can do this by simply startind the pump without starting the computer. You can namely start up the power supply by shortening the green connector with a black and then turn on the power. The green namely controls the activation and the black is earth.
The front is glued to the DVD-burners holders, which is screwed on to the unit and can be removed. Make sure you glue the unit standing up, making sure that the sled doesn’t touch the edges.
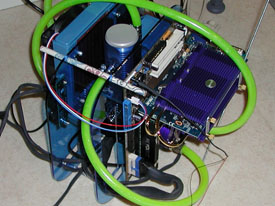
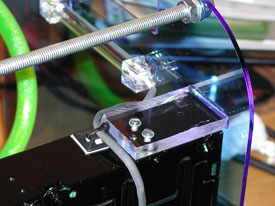
The video card is, as we mentioned earlier, very heavy now that it has been equipped with a big passive heatsinkand has to be anchored for support, otherwise it might break and in worst case bring the mainboard down with it. Therefore I cut off a piece of aluminum and a screw that was screwed into the video card and then hang on to one of the long bolts.
Remove the cover from the first plexiglas and you can now see that the DVD-burner hangs free in the air and that you can see the electronics. Ths small diode has been replaced with a bigger blue one that shines through the glas when the unit is active. You can’t see it or any button as it has been rmoved and moved to the back of the case.
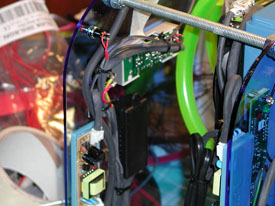
All cables have been sleeved to brig some order to them. Cables are from nice having hanging around, but I have tried to pull the cables as good as I can through a channel below. They are of course fastened with small black cable ties.
The computer’s display is in the front, at the top so it’s easy to spot. We will talk about it more when we go through the control units and lights in the next chapter.
Since my goal was to make the computer the center of the party i had to come up with some fun (although original) way of Controling the lighting. I decided to combine UV-light that react to all the contacts, wires and the fluid in the watercooler with blue lightnings since the windows are tinted blue.
The computer can not be activated on any other way then using the radio remote, it’s both cool and you won’t have to get up from the couch, it’s also different. The unit we’re using is a radio reciver from Velleman togheter with a transmitter that looks like a car alarm.
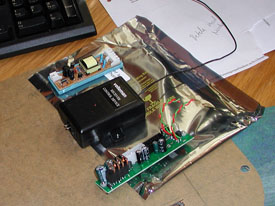
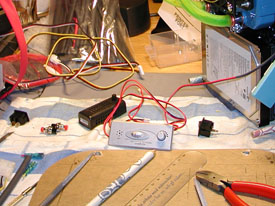
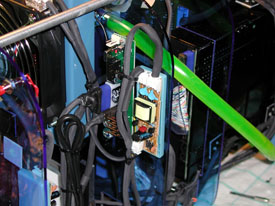
We’re attaching the receiver to the back of the chassi or more excatly between sheet three and sheet four and it already got a transformer connected to it since the power supply unit can’t deliver 12 volt when the computer is shut off.
The pump is driven by a unit that is connected to the power supply unit and hence starts everytime the computer is turned on. You can connect the Control unit to the mainboard so you can moniter the flow and make sure that it really is pumping water. If the pump stops working the control unit can shut off the computer so it dosen’t overheat.
The UV-lights has two modes, on and off is control with a button on the back of the computer. The blue lights has got several modes, on, off and the choice if it should just be flashing or if it should be flashing in pace with the music you’re playing. This is Controled with a soundControl from Sunbeam.
The fan that’s located on the radiator is Controled using a variable so that you can always chose the speed of the fan and thereby also Control the soundlevel.
The fluid in the system is as mentioned reactiv to UV-light, in other words it glows when it gets in contact with UV-light wich generates a cool effect in the darkness. The fluid is also natural green without any UV-light.
The UV-lights are glued onto sheet three and four with a little bit of expoxy. This makes it look like they’re floating in the air. The cables to the lights all have heat shrink tubing so that it match with everything else.
The blue lights are attached to sheet three and four, these are also glued with epoxy glue even though there not attached directly at the sheet.
There’s also a reset button on the back of the computer, if the computer wouldn’t respond and you got to restart it. This can also be done using the remote Control.
All the lights get their power from special power supplies that are delivered covered in plastic. I didn’t find that very good looking so I removed the lid and let them be attached all open. This may seem dangerous since you can get a big shock if you stick a finger there, but don’t we all like living dangerous?
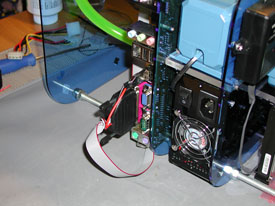
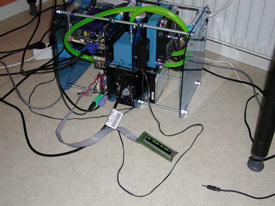
As I said before, I’m going to use a display on the front that’s connected to the printer and to a power supply. I chose a USB contact as power supply since they’ve got five volts and that’s excatly what the display should have.
there are 14 wires coming from the display, and for the simplicity of it, I used a 14 conductor flat cable and soldered it directly to the display. From there they go to a printer port connector and into the computer.
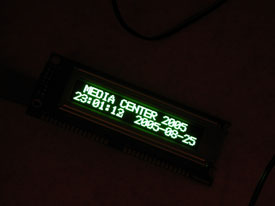
With the display you can chose to show a bunch of different messages, information and so on. I’ve chosen to show some systeminformation togheter with a plugin for Media Center 2005 so that you can see what music you’re listening to or what you’re watching.
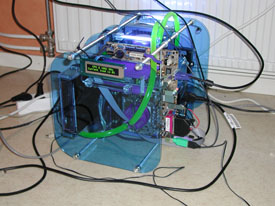
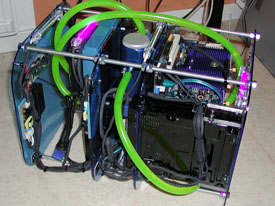
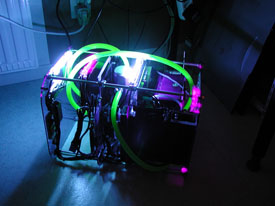
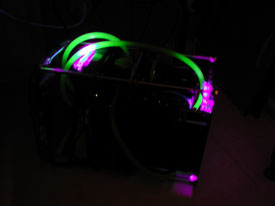
Below you’ll find some pictures of with the finished result, and after those we’ll focus on what is going to generate the complete sound experience. In other words it’s about putting something new and cool in the last PCI slot, you’ll get to read what it is in a while.
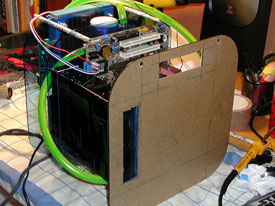
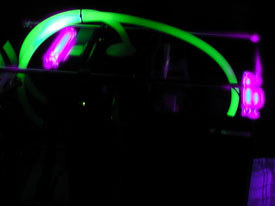
The first two pictures is on the computer in a well lit room. Keep in mind that the pictures don’t give a fair picture of the case since the UV and other lights are playing tricks with the camera..
It’s when the lights are out that Mjo Media Center comes to its full rights.
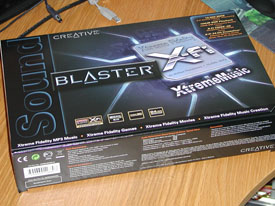
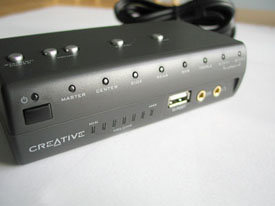
What has got over 51 million transistors and is capable of executing the same amount of instructions per second as if you would have an extra 3,4 GHz CPU? It’s the new Sound Blaster X-Fi from Creative, of course.
The soundcard got three modes, gaming, entertainment and creation that makes the card specialize on that function for the moment and uses the processing power to do what you want to do. You can very simply change function in realtime using the application that comes with the card. Since I’m going to use the card for media of different sorts I’m activating entertainment mode and right away I get 100% of the audio processors power to concentrate on optimizing the quality of the sound for my chosen speakers and for how the room is built.
Creative X-Fi 24-bit Crystalizer, yes that’s the name of the function that’s going to give life to old media, in other words 16-bit CD-audio. The target with this function is to take material that’s 16 bits and restore the dynamic frequency range of the instrument without having access to the original material. It might sound like baloney and I must say that I was sceptical before the test, however I got slightly confused.
Old material got a whole new feeling where the instruments feels much more defined then before. Drums got another boost and the real low bass got even heavier.
So finally we can say that it’s the end of all the compression and instead we get a soundcard with a processor that can increase the information that’s finally going to the speakers and will be enjoyed by you, in a comfortable couch with a cold refreshing drink as company.
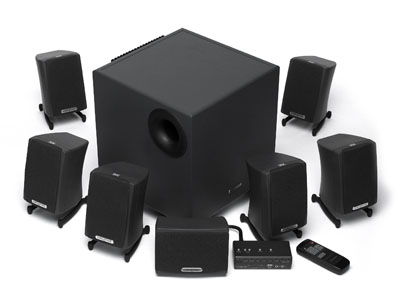
The obvious partner to Sound Blaster X-Fi is ofcourse Creative Gigaworks S750 and if you haven’t read our review of that package i suggest you do so now, by following this link. Since I’m moving to a house right now I can’t present any pictures of the livingroom, they will however be placed there permanently and togheter with the Mjo Media Center be the heart in the entertainmentsystem.
Be on the lookout for our review of this soundcard! [Editor’s note: the review can be found here]
It’s been a lot of fun building the computer even with many hours of hard work using a small file and sandpaper. It has also left a huge hole in the wallet. It’s pretty unbelievable how much money all the small things like sandpaper, paint, hose clamps and plexiglass costs when you put it togheter.
Despite all this it’s now in it’s rightful place in the living room as the entertainment machine. And for those of you who’s wondering, yes I’m still living with my girlfriend.
|
MjO Media Center 2005
|
|
|
Pros + The centre of the party, both functional and in appearance. + Completely Wireless. + Quite simply striking. Cons – It might have negative effect on steady relationships. Price Due to the risk of anxiety I can’t even think about how much all the things for this computer cost. Contact information Creative: http://www.creative.com |


