Två av de mest välkända överklockarna i Sverige var tillsammans med ASUS på CeBIT och resultatet blev bland annat en kvartett Tri-SLI världsrekord och en unik guide för att spänningsmodda GeForce GTX 285.
Overclocking demonstrations have become quite common at various Live events around the globe. We at Nordichardware have been doing it for many years starting at DreamHack and there are especially two Swedish profiles that comes to mind here. The first is Robert “crotale” Kihlberg who has summarized his experiences in this article from CeBIT 2009, the second is overclocker ace Marcus “Kinc” Hultin. Marcus has a past here at NH, both as a writer and overclocker, but for the last year he has been working for component manufacturer ASUS.
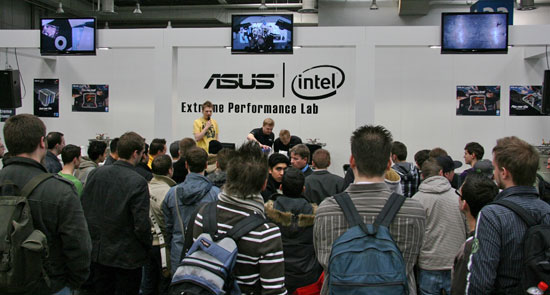
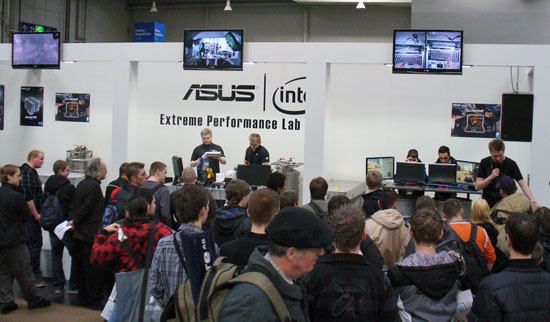
Both Marcus and Robert have done a lot of competitions and Live events over the last couple of years and it was with ASUS as the sponsor that Marcus and Robert traveled to CeBIT 2009 with sacks of LN2 pots and computer hardware. In this article Robert will give us a closer look at their overclocking event and offer some unique material like an exclusive guide to voltmodding NVIDIA’s GeForce GTX 285.
With minimal advance planning yours truly (Robert) was invited to CeBIT to participate in ASUS’ booth. Overclocking was the topic, much like the shows we had done at DreamHack. With a week to go, there was still a lot of work to do. Marcus and I had decided to test a setup of three ASUS GTX285 to test something else than Quad-SLI. The GTX285 cards are widely known for overclocking headroom on the memories, compared to GTX295, and we were simply curious to find out what kind of performance you could extract from these. Tri-SLI was not new to use, so all we had to do was fit the cards with the proper LN2 pots and turn up the voltages, right? Not quite…
Preparations of graphics cards
The stock cooler was removed in an instant. After that things came to a halt as the power circuitry looks nothing like GTX280, GTX260 or GTX295. A time consuming discovery, but something we are used to with new graphics cards. The stock voltage was about 1.2V which wouldn’t take us far.
Thankfully the chipset was well documented and the voltage modifications for similar chips are available. Said and done after a couple of minutes of discussion over MSN (Marcus in Stockholm and Robert in Linköping) the graphics card was modified and a LN2 pot was mounted. Already at 1.3V the overvoltage protection (OVP) kicked in and a few minutes later we were digging deeper into the data sheet.
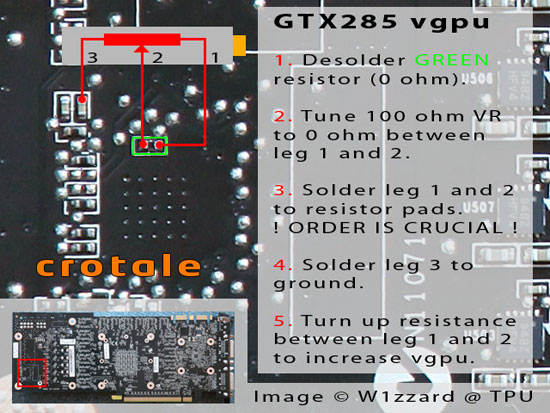
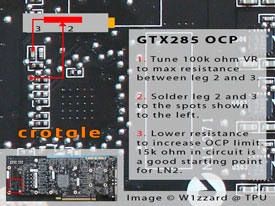
From pure chance* the card had been designed with a zero ohm resistor that suited our needs perfectly. (* a more probable explanation is that this electrically seemingly meaningless resistor of the loop had been mounted for routing technical reasons). The resistor was removed and in its place we soldered a potentiometer. The card was assembled once again and Marcus started testing the overvoltage protection right away. The second mod turned out to be successful in tricking the chip not to trigger the protection. The picture below is a guide for this modification.
The first serious tests could now start. The card was cooled down as the frequencies and voltages went up. All of a sudden the card hit a wall that turned up as some form of black screen during load. After some research we concluded that it was most likely the over current protection (OCP) that had been triggered. Back to the drawing board.
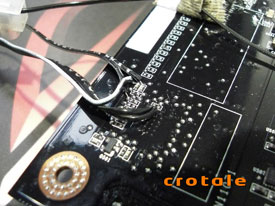
Measurements and calculations from the data sheet implied that the over current protection was at 200A, which at 1.2V would mean about 240W. Not unreasonable to assume this when running at frequencies slightly north of 900/1800MHz core/shader. Raising this limit turned out to be fairly easy. (the chip use a leg to create a reference current via a resistor to ground. Lower resistance raise the reference current). This is how the mod is done.
Marcus’ continued tests were successful as both OVP and OCP was a thing of the past and the card was now able to really stretch its wings. The updates kept streaming in via MSN and it turned out that the card could now operate at about 1100/2200MHz core/shader. Very successful preparations in other words. Time to pack the other two cards and actually a fourth as backup to be completely honest.
We present the components that we eventually used on the next page.
|
System specifications |
|
| Hardware | |
| Motherboard | ASUS Rampage II Extreme |
| Processor | Intel Core i7 Extreme Edition 965 |
| Memory | Corsair Dominator TR3X3G1866C8D (3x1048MB) |
| Graphics card | 3 x ASUS ENGTX285 |
| Power supply |
Silverstone 1200W Corsair HX1000 |
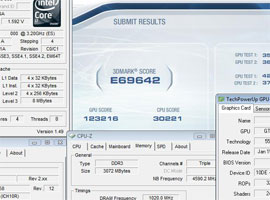
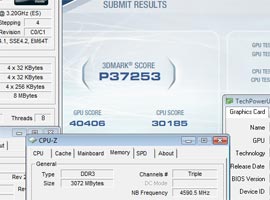
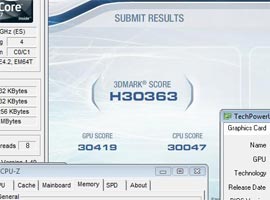
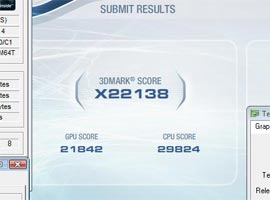
ASUS has some solid experience from similar successful events and this even went on with few complications. Up to 1000 liter liquid nitrogen was rolled out the first day. An amount that we would definitely not need. When in place the modding of the two remaining cards was the top priority. Eventually all three cards where installed in the motherboard together with a well tested Core i7 965 processor. Plug ‘n’ Play as we say. Post check cleared and activating Tri-SLI posed no problem. The remaining two days can be summarized in dosing nitrogen where we managed to accomplish the following results.
– Click for fullsize screenshots –
– Click for fullsize screenshots –
These results are the fastest Triple-SLI results in the world and top 3 no matter the hardware. With that said we hope that more people discover GTX285 and that there is a lot of performance and flexibility with Triple-SLI.
Overall we’re pleased with what we accomplished but we still believe there is more to get from these things. It’s always hard to achieve results under these circumstances. In a not too distant future we will be trying some other hardware, so stay put for more results. We are also waiting for more pictures from the event that we hope to the article with soon. Before we end things we would like to thank ASUS, Intel and Corsair for all of the high-end hardware.


