Intel’s Pentium 4 CPU has shown to be a real long runner. A number of different cores and a wide range of mainboard chipsets later it is still many enthusiasts clear choice thanks to its performance, overclocking abilities and not at least stability. Intel is still dominating the chipset market for the P4 and if someone knows how to build a stable chipset for the processor it must be Intel of course.
Intel’s Pentium 4 CPU has shown to be a real long runner. A number of different cores and a wide range of mainboard chipsets later it is still many enthusiasts clear choice thanks to its performance, overclocking abilities and not at least stability. Intel is still dominating the chipset market for the P4 and if someone knows how to build a stable chipset for the processor it must be Intel of course.
Just before the summer the i875P and i865PE chipsets were launched together with the 800MHz FSB version of the P4. This was a great step forward for the P4’s performance not just because the bus speed was magnificent raised but also that they managed to match the memory bandwidth with the bus thanks to the Dual Channel DDR400 memory controller on the new chipsets.
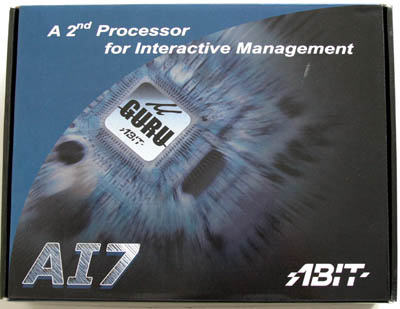
Since the launch several mainboards based on these chipsets has been pumped out in all versions. The competition about the P4 owners favor has been extremely intensive but some manufacturers have even managed to stand out from the crowd with their astonishing products. Both ABIT’s IC7 and IS7 series has been incredibly successful but despite this the company has not been lazy, instead they still continues to develop new mainboards in a blazing speed. The latest addition is ABIT AI7 which we shall look closer at today. The card might be seen as the sequel to the IS7 considering the many similarities. Although, a couple of not completely unimportant aspects differ the cards from each other, for example, ABIT’s uGuru function which makes the overclocking very easy in a Windows environment. More about this later, first we shall take a look at the specifications.
|
Mainboard chipset: |
Intel
865PE (MCH) + 82801ER (ICH5R) |
|
Processor support: |
Intel Pentium 4/Celeron Socket-478, 533/800 MHz FSB |
|
Memory support: |
4xDIMM
266/333/400MHz DDR (MAX 4GB) |
|
Integrated graphics processor: |
–
|
| AGP: |
1x
AGP 8X |
| PCI: |
5 x 32-bit bus master PCI |
| IDE
controller: |
4
units, ATA 100/66/33 |
| RAID
controller: |
–
|
| SATA
controller: |
2x
150MB/s through the South bridge with RAID 0 |
|
Network circuit: |
Realtek
8100C 10/100Mbps |
|
Audio circuit |
6
channel Realtek AC97 Codec |
| FireWire
(IEEE-1394): |
1
x through the rear panel, 1 x through the rear bracket, maximum 3 ports |
| USB
2.0: |
4
x on the rear panel, 2 through a bracket, max 8 ports |
| Price: |
~
1200SEK |
| Price
and Availability |
AI7’s price is
set just as IS7’s. The thought is that the board should replace the last mentioned
which soon has been on the market for half a year. The IS7 was in terms of
price a very competitive board that offered the consumer much for the money
and the same has to be said about the AI7. Despite everything the AI7 can
do everything that the predecessor could, and some more. 1200 SEK is for most
of the consumers a very reasonable price. When it comes to availability it
is exactly as before very good for the AI7. All the major retailers has begun
to fill the warehouses with the AI7 and the little bit more extravagant version
named AI7-G. Something tells me that this will be a board that many Santa
Claus’es will ask for in the momentary Christmas shopping.
|
Accessories and features |
Unfortunately
the accessories list of the AI7 is pretty poor. We find no rounded cables
or P-ATA->S-ATA converters but only grey flat cables, an USB+FireWire bracket
and the I/O plate. In terms of software there is neither much to cheer for.
Of course there are drivers but not much more than that. Though one highlight
exists and that is ABIT’s uGuru software. The uGuru package contains programs
for updating of the BIOS in Windows, overclocking in Windows, system monitoring,
fan controlling and last but not least there is a Black Box function which
will give explanations for what the cause would be if the computer crashed.
|
|
|
The board’s integrated
features are the same as we have seen on ABIT’s IS7. There are 2x Serial ATA
ports with RAID0 support, build-in 10/100MB/s NIC, USB 2.0 and FireWire support
and of course integrated sound based on the AC97 codec. That ABIT has chosen
to stick to the south bridge ICH5R instead of what many other manufacturers
chose to do, replace it with the cheaper ICH5, is a nice bonus since this
gives us RAID0 support for both the S-ATA channels.
Something that
assuredly is not new but still has to be mentioned is the rear panel that
has got a really good layout. Here we find 4 USB ports, FireWire ports, 5
audio connectors, S/PDIF with optical in and outputs, the NIC connector and
the ordinary ports such as PS/2 etc.
If you need more USB or FireWire ports there is a bracket included which
easily is connected to the internal controllers. Total a number of eight USB
2.0 and three FireWire ports can be used.
On to the
layout.
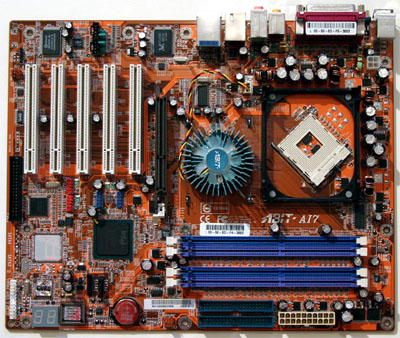
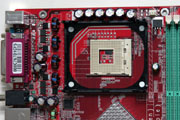
The colour may
be the same but the layout differ a lot from the IS7. For example the socket
is this time rotated by 45 degrees. The mounting cage on the other hand is
in the ordinary position parallel with the mainboard’s edges. Furthermore
the socket is placed a couple of centimetres further into the board this time.
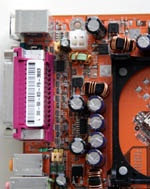
The capacitors around the sockets are this time not only placed to the left
of the socket but also above in the space between the socket and the mainboard’s
upper edge. As usual the capacitors cause no problems as long as you use a
cooler which fits within the plastic cage. The 12v contact has also been moved.
Now the little white one sits at the top just next to the edge of the board.
This is a lift from IS7 since the 12v contact does not need to be pulled down
as far in the case this time which minimizes the risk of the cable getting
stuck in the fan. The ideal would be to place the contact to the right of
the socket instead so that the ATX and 12v cable would have been pulled down
through the case as one cable but the current positioning is still an improvement
since the IS7.
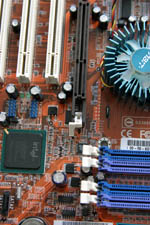
The DIMM spots are still four to the number, the standard for i875 and i865
based mainboards. Next to the memory slots is the ATX contact but also the
both IDE channels. Accordingly, on the AI7, ABIT has chosen to leave the design
with turned IDE connectors and returned to the original design where the connectors
are plain fastened on the mainboard. It is uncertain why they have chosen
to do this.
|
|
While we’re at
the DIMM banks we can measure the distance between the DIMM banks’ clips and
the AGP port. The distance is clearly big enough thus it should not be a problem
to change memory modules without having to remove the graphics card, even
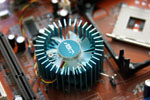
if it is a monster such as the flagship in the GeForce FX series. The north
bridge cooler is the same as the one on the IC7-Max3, which means a big aluminium
heatsink in Orb design. Hopefully this type of cooler has a higher quality
than the one we saw on the IS7. The latter had problems in certain cases since
it was quite noise after a relatively short period of time.
|
|
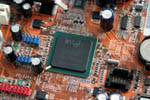
The southbridge
on the AI7 is of the model ICH5R that means that the mainboard’s two S-ATA channel
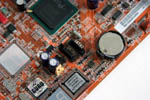
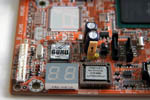
also has RAID0 support. Diagonally below to the right we find a small POST code
LCD, which shows error codes during the boot process. Right next to it we also
find the uGuru which is ABIT’s strongest argument to why one should invest in
an AI7. The name A(rtificial)I(ntelligence) somewhat allude to that the card
is smarter than the competitors offers. Exactly what the uGuru circuit means
to the user is mentioned later in the review.
|
|
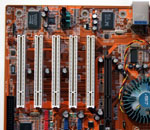
If we look to the
left of the south bridge we find the internal FireWire and USB connectors. If
the integrated features are not enough it is perfectly alright to fill the five
PCI slots which the AI7 has. Below the PCI slots we find the floppy connector.
To place the connector down here quite strongly indicates that floppy units
are on its way to disappear from our computers. For example if you mount the
board in a Full Tower the chance is very small that the cable will be enough
all the way. Floppy units are simply the lowest priority now. Honestly this
is nothing that many users will care about, since now you can flash the BIOS
directly in Windows, thus the Floppy Drive’s days are counted.
It is nice to see
that ABIT has continued to develop the IS7’s already more than well passed layout.
The improvements are admittedly pretty small but it shows that the company is
not lazy when it comes to product development but really reaches to give its
customers something better every time they release a new model. Now it is not
a long time left until the company also on its cheaper boards reaches the goal,
the perfect layout. And we continue on to the BIOS section.
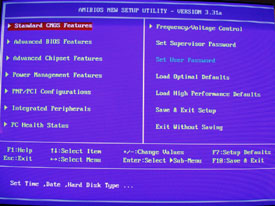
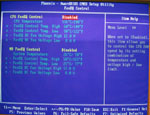
The AI7 is of course equipped with a Phoenix AwardBIOS and just as usual there is a SoftMenu section which provides for good overclocking.
We begin as usual with the CPU settings. The FSB can be raised up to 412MHz which is a value you can only dream about reaching. Not only the FSB values are generous but the CPU’s max voltage is also set extremely high. 1.925v is the highest value and to be honest one would need a couple of minus degrees Celsius before daring to go that high. Also the memory voltage can be raised very high. The max value is 3.2v which is more than enough for anything you can find on the market today. The memory ratio is as usual, 1:1, 5:4 or 3:2.
It is really fun to see that all our criticism on the IS7’s BIOS has been corrected. The AI7 has overclocking properties that are as complete as you could wish.
Below we summarize the configuration possibilities for the CPU and memory.
|
BIOS
settings |
|
| FSB frequency: |
100-412MHz (1MHz intervals)
|
| AGP frequency: |
fixable, between 66-99Mhz
|
| CPU voltage: |
1.5v-1.925 in 0.0125v intervals
|
| DIMM voltage: |
2.5v – 3.2v in 0.05v intervals
|
| AGP voltage: |
1.55v
– 1.65v (0.05v intervals) |
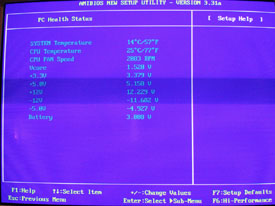
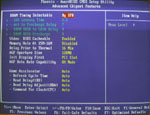
It’s not only in the overclocking section where enhancements has taken place since the IS7. The PC-Health section for example has been improved and widened. Now there are separate sub menus for voltage, temperature etc and there’s also a section where we can set the threshold values for the temperature controlled fans. Otherwise the rest of the AI7 has the same setup as the IC7/IS7 and therefore it doesn’t feel meaningful to write much about the remaining menus. Advanced Chipset Options controls the memory’s timings and “Game Accelerator” (ABIT’s equivalence to PAT), and under the headline Integrated Peripherals we find the settings for the board’s integrated features.
|
|
What should I say? The AI7 has a completely brilliant BIOS and it is not surprising that it is ABIT which is the author. Though the fun doesn’t end here but continue on in the next section where we look closer at the uGuru function.
| uGuru |
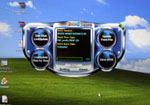
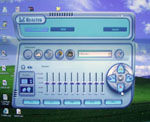
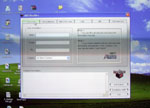
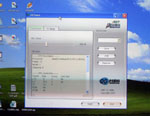
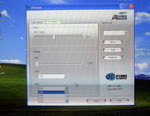
One of the big news on the ABIT AI7 is the uGuru circuit. This is an extra circuit on the mainboard which through Windows software handles a number of functions that are supposed to make the enthusiasts life easier. The applications and their functions are as following:
FlashMenu: This is a program to flash the BIOS directly in Windows. A simple push of a button is everything that is needed and everything takes care of itself.
ABIT EQ: A surveillance program which show temperatures, voltage and fan speed of the components you select.
AUDIO EQ: This is an equalizer for the integrated sound card. Simply a little bit nicer than the original one.
FANEQ: FANEQ is a program that let us choose the values at which the fans should lower and raise their speed. The thought is to eliminate the noise and at the same time maximize the cooling. At low stress you simply run the fans at half speed and when the games are running the rpm is increased again.
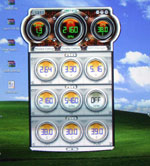
OC-Guru: The grain of gold among the applications is the OC-Guru which let us overclock the system directly under Windows. Here are all the settings you need for FSB, voltage etc but unfortunately one little mistake has slipped through. It is not possible to configure neither the memory ratio nor memory timings. A shame on an otherwise great function. Below you can see images of the individual programs.
|
|
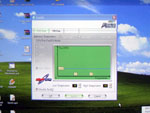 Fan EQ |
|
|
Overclocking |
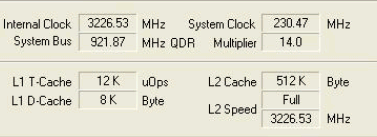
Have we ever had any problems overclocking our ABIT mainboards? Well not in the last six months at least and ABIT AI7 is not about to break the trend it seems. On the first try we managed to get the 230 MHz which is the processor’s upper limit. It’s really boring to be hardware limited in this way since I simply believe that the AI7 had crushed most of the market today.
Next we have the test systems’ configuration.
|
The test systems |
|
|
ABIT
AI7 |
|
| Processor: |
Pentium
4 2.8Ghz |
| Mainboard: |
ABIT |
|
RAM:
|
2
x 256MB GEiLPC3500 Ultra CL2 |
|
Other hardware found in all the test systems:
|
|
|
Graphics card:
|
nVidia
GeForce FX 5900 Ultra 256MB @ 450/850MHz |
|
Harddrive:
|
80GB
Maxtor 740DX |
|
Software
|
|
| Operating system: |
Windows
XP Professional SP1 |
| Resolution: |
1024x768x32bit,
90Hz |
| Drivers: |
Detonator
52.16 WHQL DirectX 9.0b Intel chipset driver 5.0.2 |
|
Benchmarking software: |
Quake
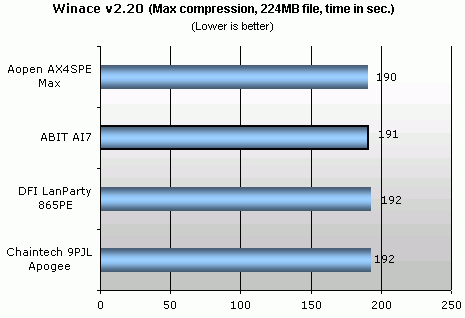
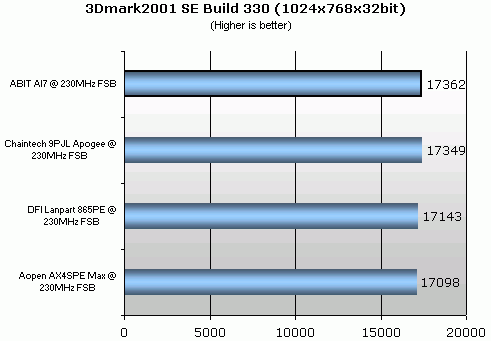
3:Arena v1.32 Unreal Tournament 2003 demo v.2206 3Dmark2001 SE 330 Comanche 4 benchmark SPECviewperf 7.1 Winace v2.20 Audioactive Production Studio 2.04j (Fraunhofer II encoder) SiSoft Sandra 2003 WCPUID |
The
memory timings were 2-2-5-2 as usual during all the tests.
Furthermore the game tests has been run with the Game Accelerator
settings set at “F1”. Below is a table with the effective clock
freqeuency of all the cards which are included in the performance
test.
ABIT’s
AI7 keeps itself close to the 200MHz limit. In other words no risk
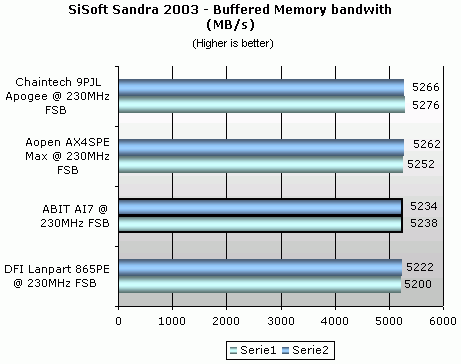
for the card to get an unfair head start. As usual SiSoft Sandra
begins the test suite.


