This is one of those reviews that’s a bit extra fun to write. The expectations are huge and not without reasons. ABIT’s MAX mainboards has so far impressed heavily on reviewers around the world and after owning one myself and using the MAX2 for over a year, I can’t do anything else than to say good things about them. The MAX boards has always performed very good specially under overclocked circumstances, and furthermore, each incarnation of the MAX series has been very innovative.
This is one of those reviews that’s a bit extra fun to write. The expectations are huge and not without reasons. ABIT’s MAX mainboards has so far impressed heavily on reviewers around the world and after owning one myself and using the MAX2 for over a year, I can’t do anything else than to say good things about them. The MAX boards has always performed very good specially under overclocked circumstances, and furthermore, each incarnation of the MAX series has been very innovative. The first MAX board, for example, had no PS/2 connectors and the second version offered both P-ATA RAID and S-ATA over the two ordinary IDE channels. Something that was revolutionary at the time. Now the time has come to number three in the series and it shall be exciting to see if ABIT comes yet another step closer to the perfect mainboard.
|
Mainboard chipset: |
Intel
875P (MCH) + 82801ER (ICH5R) |
| Processor support: |
Intel |
| Memory support: |
4xDIMM
333/400 MHz DDR (MAX 4 GB) |
|
Integrated graphic circuit: |
–
|
| AGP: |
1x
AGP 8x |
| PCI: |
5 x 32-bit bus master PCI
|
| IDE controller: |
4
units, ATA 100/66/33 |
| RAID controller: |
–
|
| SATA controller: |
2x
150 MB/s via the south bridge with RAID 0 support, 4x 150 MB/s via a Silicon Image circuit, totally 6x S-ATA |
| Network circuit: |
Intel
CSA GigabitLAN |
| Sound circuit: |
6
channel AC97 Codec + S/PDIF in/out on the rear ATX plate |
| FireWire (IEEE-1394): |
1x
on the ATX panel, 2x via bracket |
| USB 2.0: |
4
ports externally, 2 internal headers for 2-port brackets, totally up to 8 ports |
| Price: |
~
€290 (Exchance rates) |
The specifications
of the IC7-MAX3 are almost identical to the IC7-G. The only real difference
is that the Silicon Image circuit on this board can take up to four extra
S-ATA units while the old one only took two.
| Price and Availability |
The pricetag
is not really one of the MAX3’s strenghts. The board costs about €50
more than the IC7-G, and if we look at it it’s really only two more S-ATA
ports we get. The MAX boards is much about image and unfortunately, it has
a negative effect on the pricetag. This is no board that you buy because you
want as much as possible for your money; this is a board you buy because you
want the worst there is. That’s it. The availability though is, as always
with ABIT, very good. The board can be found almost everywhere so it’s just
the price that can stop you.
|
Accessories and Features |
When it comes
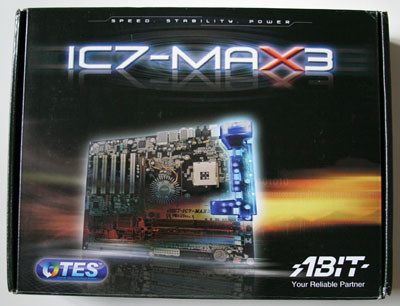
to the packaging I would really expect more from the MAX3. This supposed to
be ABIT’s “top of the line” product and the high pricetag must mean
a lot more candy in the carton, right? Honestly, I was quite dissapointed
with the packaging of the MAX3. Sure the carton, manuals and so on are well-designed
but the physical accessories feel quite parsimonious for a board of this caliber.
Four S-ATA cables with corresponding power supply cables, one rounded P-ATA
cable, one rounded floppy cable, one USB+FireWire bracket and an I/O plate
is all you get.
Okey, almost everything; it also comes with an extra piece of hardware that
ABIT refers to as Secure IDE. This is a thing you connect between the mainboard
and the harddrive and it delivers a 40-bit encryption of the data that is
on the harddrive. For the data to be readable you must insert a key in the
key reader which is mounted on a bracket. The pros with this is that it is
a simple system for protection of data mostly aimed towards the home user.
On the paper this looks like a fun little extra thing but in the name of honest
I will probably never even test it. First of all, the disk that is to be connected
to the Secure IDE circuit must be blanked and repartitioned which you probably
don’t want to do. Secondly, you can only connect one harddrive at the time
to the unit and, lastly, 40-bit encryption feels pretty meanless. If anyone
really wants access to my documents, I guess they can pass the 40-bit encryption.
Admittedly, home users are not really in the danger zone of good “data
thieves” but it’s enough to password protect sensitive documents so that
your friends, kids, wife or who ever it is can’t access them. Secure IDE is
actually a pretty useless feature in my humble opinion.
Instead of adding the Secure IDE, ABIT could have enclosed another rounded
P-ATA cable, two or more S-ATA->P-ATA converters and a memory card reader
or something else useful. Just the fact that it doesn’t include one single
S-ATA->P-ATA converter speaks against the packaging of IC7-MAX3. Overall,
the packaging is certainly pretty good but considering the pricetag and the
hype around the board I had expected something extraordinary.
|
|
The board’s features impress definitly more than the accessories, although
I even here miss that extra that makes the board a “Max” board.
IT7-MAX2 is an example which was first with both having an extra S-ATA and
P-ATA controller onboard and the MAX1 was the first board without PS/2 ports,
but number 3 in the MAX series doesn’t really offer anything that hasn’t been
done before. For example, the only difference from the IC7-G is that the MAX3
has two S-ATA ports more and it is not really a significant thing. I would
peresonally have seen a P-ATA RAID controller with RAID 1.5 support instead.
Well, let’s forget the bad sides for a moment and instead look at the things
that make the MAX3 such a wonderfully feature-rich board.
The MAX3 offers possibilities to connect up to six S-ATA harddrives. Four
of them are handled by a Silicon Image circuit and the other two are handled
by the southbridge, with RAID0 support of course. The network circuit onboard
is also something extra since it is an Intel 1000 Pro circuit which delivers
up to GigaBitLAN. The sound is as usual an AC97 codec-based one and provides
six channels if you want. Also, optical in and output are on the board which
makes it well-equipped in ways of audio. If you want to connect other things
than disks and CD recorders, it can be done via one of the eight USB with
ease. FireWire ports are only three of but it is more than enough in most
cases. If all this is not enough you can always pop in another 5 PCI cards.
In
ways of features, it’s a good card, but unfortunately that “wow”
feeling is missing. The card is as mentioned almost identical to the IS7-G.
Just as with the IT7-MAX2 boards and ABIT’s Canterwood board IC7/IC7-G, IC7-MAX3
is manufactured on a black PCB. The purpose of this is among other things
to separate the MAX board from the crowd and give it a feeling of exclusiveness.
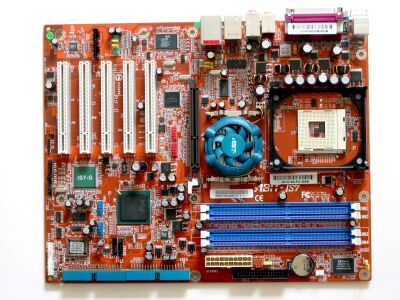
Our walk around
begins as usual with the socket. This time, it is no longer by the edge but
a bit further in on the PCB. Above the socket ABIT had to squeeze in its little
wind tunnel , the purpose of which is to cool capacitors and voltage regulators.
Since the wind tunnel, or OTES cooling as ABIT calls it, takes up quite much
space it is also tighter around the socket. The distance up to the OTES cooling
is minimal. The distance to the northbridge cooling is not much better either.
Since the OTES cooling goes half-way around the socket on one of the sides,
it is quite tight there as well. The only place where you can find much space
around the socket is on the left side. The fact that it’s tight around the
socket is nothing that will cause problems for most of people, but if you
have a cooling that is bigger than the one that fits within the socket’s plastic
cage it can get very tight.
Above the socket is the OTES cooling (Outside Thermal Exhaust System). The
target is, as aforementioned, to cool power supplying components and capacitors
to increase the stability of the system, especially when overclocking. The
system consists of small heatsinks on vulnerable capacitors and a plastic
tunnel with a small fan in the end. The heatsinks transport the heat from
the capacitors to the air and the air is then blown out through the tunnel
with the fan. The system was first used on ABIT’s graphics card in the Ti4200
serie and has now begin to be used on the mainboard front. Right next to the
OTES cooling is the 12V contact, nicely placed to the upper right edge of
the board.
|
|
In the upper
right corner of the board, we can as usual find the DIMM banks, the floppy
contact, the ATX contact and the power connector for the CPU fan. If we look
downwards to the AGP port, we unfortunately have to point out that the distance
between the DIMM bank clips and the AGP port is way too short. Especially
as a reviewer want to be able to change memory modules without having to take
out the graphics card and this is an impossibility with this card; at least
if you use a newer high-end cards.
|
|
There is much
that’s reminiscent from the ordinary IC7, but the northbridge cooling is actually
new. The new design gives a much more well-built impression than the plastic
cooler that was used on the IS7/IC7 series. Furthermore, this is also a so
called "smart fan" which means that the RPM of the fan is adjusted
by generation of heat from hot components. Healthy for your ears is the catchphrase.
The IDE contacts are still placed side-by-side and we concluded it to be a
good thing. Later on, it is actually quite nice that they are next to each
other and not behind each other as they normally are seated. It should be
user-friendly and it is. Behind the IDE connectors we find the southbridge,
the ClearCMOS jumper and two of the total six S-ATA ports that the card has
to offer.
|
|
All the way down
on the board, we find the Silicon Image S-ATA controllers with its four connectors.
This makes it possible to connect up to six S-ATA harddrives. More than enough
or what do you say? Diagonally above to the left, we find the internal headers
for USB and FireWire. The board supports totally 8x USB 2.0 and 3x FireWire.
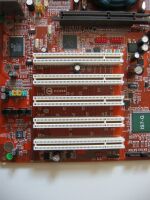
If the integrated features are insufficient, you always have five PCI slots
to fill up.
|
|
The ATX panel
offers much in way of connections. Four USB 2.0 ports, one FireWire port, the
usual sound connectors, optical in and output, PS/2, a network jack for
GigaBitLAN through the Intel 1000 Pro circuit and last but not least the OTES
cooling’s little fan which exhausts the hot air.
The design of
the IC7-MAX3 is very good, especially considering how much you can fit on
the card. Surely, it gets a little tight in some places which mostly depends
on the OTES cooling taking up much space, but the card never feels difficult
to work with. Now on to the BIOS section which is something that ABIT is usually
very good at.
What
would an ABIT motherboard be without ABIT’s SoftMenu that makes overclocking
so much easier? As usual, you can configure everything you might need in the
race for additional gigahertz here. The configurations are directly inherited
from the IC7 cards, which is good when the IC7 cards probably have the best
BIOS’s we’ve ever encountered. Even Very good can be made Even better, therefore
ABIT has raised the memory’s maximum voltage to 3.2V from the slightly conservative
2.8V that the IC7 cards have been equipped with. This gives IC7-MAX3 the ultimate
overclocking BIOS for a P4 system.
Below, we have
a small table showing the most important settings.
|
BIOS
settings |
|
| FSB frequency: |
100-412 MHz (1 MHz intervaller)
|
| AGP frequency: |
lockable
and adjustable between 66 to 96 MHz |
| CPU voltage: |
1.525V-1.90 with 0.025V intervals
|
| DIMM voltage: |
2.5V
– 3.2V i 0.05V intervals |
| AGP voltage: |
1.5V
– 1.65V (0.05V intervals) |
In the “Advanced
Chipset Features” section, you can e.g. configure the memory settings. The
memory timings are freely adjustable between 2-5-2-2 and are set to 3-8-4-4.
Furthermore, there is also the “Game Accelerator” function that we have earlier
found on the IS7 and IC7 cards. This is a function that raises the cards performance
by optimizing the timings the card is working with.
However, to be able to retain 100% system stability, you need memory banks
that can handle aggressive timings. Both our Corsair XMS3200 and GEiL PC3700
memory banks, which are CL2 valued, can handle working with the function switched
on without errors. For an example, our Corsair DDR500 memory banks that are
working with the timings 3-8-4-4 can’t handle Game Accelerator turned on.
The rest of the cards BIOS follows the regular layout with a PC-Health section
and a department for the card’s integrated features.
|
|
 “Game Accelerator” “Game Accelerator”
|
Along with IC7-MAX3, the perfect BIOS we have waited for so long has finally
arrived. Until now, there has always been something to whine about, but
this time even the most evil critic can’t find anything to remark on. When
the memory voltage was raised, the last piece in the puzzle fitted in. All
that remains now is to hope that other manufacturers copy this so we can
get perfect BIOSs in non-ABIT manufactured boards as well.
| Overclocking |
The overclocking
done on the IC7-MAX3 was accomplished as easy as on the recent ABIT cards
we have tested. Into the BIOS, change the settings and you are set. Timely
enough, we got to borrow an Intel P4 3.2 Extreme Edition with its multiple
already unlocked. By lowering the multiple and raising the FSB, we could find
the limit for what the motherboard was able to handle.

305
MHz FSB is a stunning result. Certainly there are always those that can reach
higher with their CPUs, especially with the 2.4 GHz C models, but that requires
one monster cooling solution. An astounding BIOS and very good overclocking
capabilities turn the MAX3 into a frightfully attractive card for the overclocker.
Time to head over to the performance tests, but before that, a brief put together
of the test systems.
|
The
test system |
|
|
i875P
|
|
| CPU: |
Pentium
4 2.8 GHz & 2.4 GHz (800 MHz) |
| Mainboard: |
ABIT |
|
RAM:
|
2×256
MB GEiLPC3500 Ultra CL2, 2×512 MB Corsair XMS4000Pro |
|
Other
hardware used in all test systems |
|
|
Graphics
cards : |
Gigabyte
Radeon 9700 Pro 128MB @ 275/540 MHz |
|
Harddrive:
|
80
GB Maxtor 740DX |
|
Software
|
|
| OS: |
Windows
XP Professional SP1 |
| Resolution: |
1024x768x32
bit, 90 Hz |
| Drivers: |
Catalyst
3.7 DirectX 9.0b Intel chipset driver 5.0.2 |
|
Test
programs: |
Quake
3:Arena v1.32 Unreal Tournament 2003 demo v.2206 3Dmark2001 SE 330 Comanche 4 benchmark SPECviewperf 7.1 Winace v2.20 Audioactive Production Studio 2.04j (Fraunhofer II encoder) SiSoft Sandra 2003 WCPUID |
All
the benchmarks where performed with the memory timings set at 2-2-5-2,
except for the overclocking tests where we used Corsairs latest
DDR500 modules with the timings set at 3-4-8-4.
A table with the effective clock frequency can be found below.
Number
one is as usual the memory tests in SiSoft Sandra 2003.


