ECS is best known as an OEM manufacturer, but have, time to time, shown interest in the retail channel, among others an enthusiast motherboard based on the ATI RD480 chipset. Today we will look at one the latest boards from ECS based on the AMD 690 chipset.
The HTPC market has been growing steadily for the last few years and has become a factor to consider for the motherboard manufacturers. It wasn’t that long ago you could take a box with a mATX board off the shelf, read the specifications and try to keep yourself from laughing while putting the box back.
This has all changed by now as people have started to realize that there is a place for computers in the living room, for multimedia and entertainment.
For this growing market, AMD has designed a rather exciting chipset, namely the rather new AMD 690G. With features such as a built-in ATI X1250 graphics chip, with both DVI and VGA outputs with Windows Vista certifications, it seems like a very promising chipset for an HTPC.
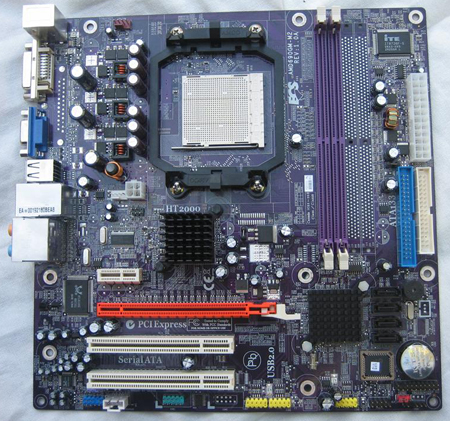
ECS has supplied a board based on the AMD 690G, and on the coming pages we will evaluate the performance and features of the ECS AMD690GM-M2.
 |
|
| ECS AMD690GM-M2 | |
| CPU support | AMD® Athlon 64 X2, Athlon 64, Athlon FX and Sempron in the Socket AM2 package |
| Chipset | AMD® 690G and SB600 Chipset |
| Memory | Dual channel DDR2 400/533/667/800MHz 2 DIMM-slots Max 16GB |
| Expansions slots | 1x PCIe x16 slot 1x PCIe x1 slot 2x PCI slots |
| Storage | 1x Floppy 1x ATA133 4x SATA II (RAID 0, 1, 0+1) |
| Internal connections | 1x Front panel audio connector 1x Front panel connector 1x CD-in connector 1x IEEE1394 connector support additional 1 port 3x USB 2.0 connector support additional 6 ports |
| External connections | 1x Parallel port 1x DVI port 1x PS/2 keyboard 1x PS/2 mouse 1x IEEE1394 Port 1x 6 in 1 audio jack 4x USB 2.0 ports 1x RJ45 LAN jack 1x VGA port |
| Formfactor Size |
mATX 24.4cm x 21.5cm |
| Price | ~$60 |
Perhaps not the most exciting list of features we’ve seen, but one shouldn’t expect that much when the price is far below $100. On the other hand, we’re rather impressed by the two video outputs (both DVI and VGA), with the possibility of a third (TV out) via an expansion bracket (not included). We consider the lack of firewire a drawback, but then again we have to consider the price, so not much to complain about really.
It might be worth mentioning that you could actually run several licenses of Windows Vista at the same time of you would happen to find two 8GB memory modules, as the memory controller of the AM2 processor supports this. We wouldn’t mind two more memory slots, but still, two is enough for HTPC usage. Besides, two is enough for dual channel for improved performance.
Let’s take a look at the board itself.
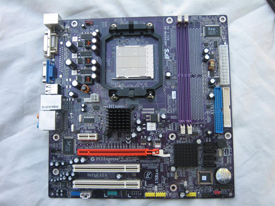
The first thing one does notice here is of course the colors of the motherboard. It actually reminds of some weird experiment where the engineers of ECS tried to combine the most annoying things from the GA-965P-DS3 with the Abit AB9 BIOS. Luckily the engineers at ECS failed in their experiment and only accomplished something almost as horrible, namely a motherboard with a violet PCB, in combination with distasteful white text and a red PCI-Express connector. Safe to say, we’ve seen more attractive motherboards, but we’ve also seen worse.
 |
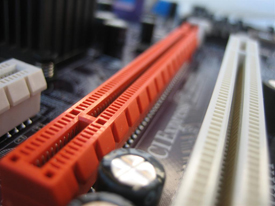 |
As shown above, the PCI Express x16 slot can be found below the x1 connector. This is unfortunate if one wants to use the two PCI slots as well as utilize a dual-slot video card.
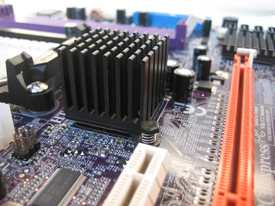
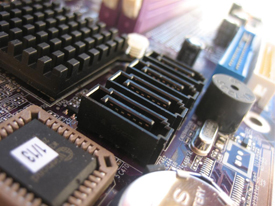
Luckily there are attempts of a more unified theme, such as the CPU bracket around the socket, the northbridge and southbridge heatsinks, and the SATA ports, which are all black.
 |
 |
Next to the black CPU bracket, we find a quantity of capacitors and voltage regulators. This time the culprit is a white +12V connector with a rather lousy placement. The placement isn’t just wrong when it comes to design, it also hinders one from hiding the +12V power cable.
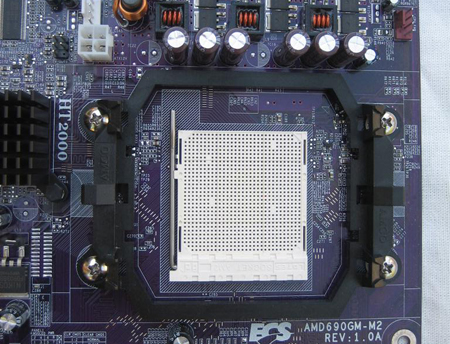 |
Overall, the layout of the motherboard is without doubt acceptable. Having said that we still wonder why ECS decided not to put four memory slots on the motherboard, as it seems to be prepared for this already. Then there’s the PCI Express x16 connector, residing just below the x1 connector. However, this can be explained by the fact that if the PCI Express x1 connector were to change place with one of the standard PCI connectors, the PCI connector would intersect the northbridge heatsink.
In other words, no real blunders. All connectors can be found near the edges of the motherboard with the exception of the +12V connector. The only thing we really didn’t approve of was the blasphemous mix of colors, but luckily for us, this type of motherboard usually resides inside a chassis. Making it much harder to spot.
Now, let us have a look inside the BIOS, shall we?
As you can see, ECS has chosen to use an Award BIOS instead of an AMI version. Something we’re very grateful of, as we believe that the Award BIOS is usually easier to navigate.
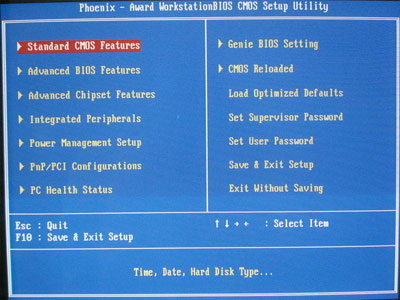 |
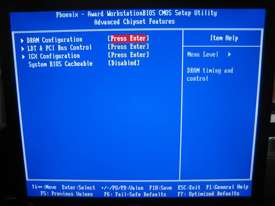
We were feeling unusually brave and decided to skip most of the standard parts of the BIOS and went straight for Advanced Chipset Features instead. With submenus like DRAM Configuration, LDT & PCI Bus Control and of course IGX Configuration, it’s totally understandable why we decided to skip the standard parts of the BIOS.
 |
 |
 |
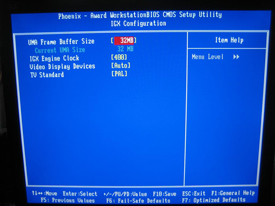 |
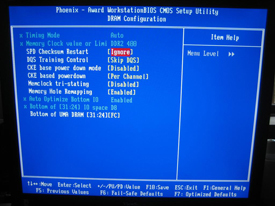
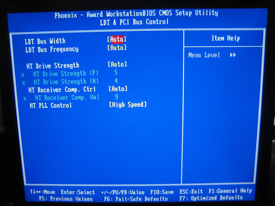
DRAM Configuration is just what it sounds like, memory settings. This is rather odd, since there’s no settings for changing the timings at all. In fact, the only settings found are these rather cryptic ones, shown below. LDT & PCI Bus Control controls the HT bus, such as its speed. The rest of the semi-cryptic settings remind us a bit of the DFI BIOS. Last but not least is IGX Configuration, which controls the integrated video circuit. Here we find a really interesting setting which gives us the ability to alter the clock frequency of the video card. The standard frequency reads 400MHz, with the lowest possible frequency being 100MHz and the highest 500MHz.
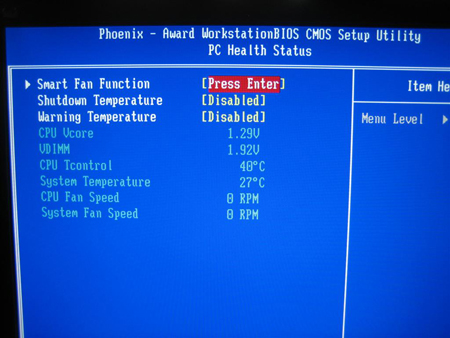
As we move on, we find PC Health Status where we find a setting that controls the CPU fan. Besides this, we have the usual line up of settings, such as Shutdown Temperature, Warning Temperature and voltage monitoring. We had our doubts when it came to the accuracy of the temperatures found in the BIOS. As the CPU heatsink weren’t hot at all, as well as several programs in Windows reported an idle temperature of just below 30 degrees Celsius, whereas in the BIOS, CPU temperature skyrocketed to 48 degrees Celsius almost immediately.
 |
Let us have a look at the overclocking features found in the BIOS (yes, we didn’t believe it at first too)
[Editor’s note: This is the BIOS from Spring, recent updates adds better and more overclocking settings.]
As you probably saw on the previous page, we’ve got a menu in the BIOS called Frequency/Voltage Control, and that is what this page is all about. As shown below, there is nothing revolutionary here, but then again, bear in mind that this motherboard wasn’t made for hardcore overclocking.
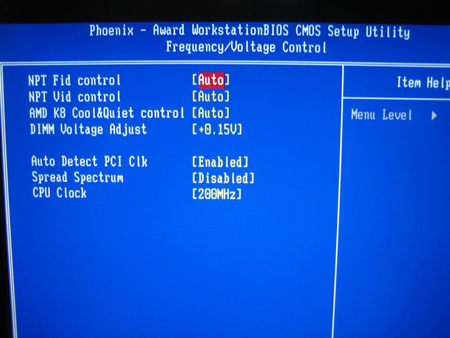 |
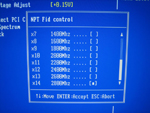
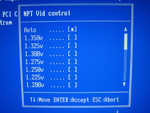
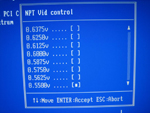
At the top we’ve got NPT Fid Control, and what the abbreviation stands for you’ll have to ask some grown-up. What we do know however is that this setting enables us to change the multiplier of the CPU. And because we’ve got a X2 5200+ we’re able to use multipliers all the way up to 14x. Just below Fid Control, we’ve got Vid Control, which is the setting for changing the CPU voltage. With a maximum of 1.35V we feel fairly safe to say that most overclockers wouldn’t jump around for joy after seeing this setting. Moving on, we find that the lowest possible voltage is an incredible 0.55V. This should make all the people wanting cool and quiet systems happy (cough – former Prescott users – cough). The BIOS supports 0.0125V increments of the CPU voltage, making fine tuning of the voltage very, easy indeed.
 |
 |
 |
Now we’ve only got two settings left unexplored. And considering the rather disappointing voltage settings available when it came to CPU voltage, we didn’t have any high expectations when it came to DIMM Voltage Adjust (Memory voltage) or CPU Clock (HTT Frequency). True enough; the highest memory voltage setting was 1.95V available through 0.05V increments from the standard DDR2 voltage, which is 1.8V. The HTT frequency wasn’t all that fun either, with a maximum of 232MHz and 200MHz being the lowest possible. Although we’re fairly sure we can’t reach 232MHz using our 14x multiplier and the weak voltage settings supplied. But we’ll try.
This is all from the BIOS, and if we try to summarize, the words “confused” and “disappointed” are the ones that first comes to mind. Confused when it comes to all the advanced settings, and disappointed when it comes to the weak voltage and overclocking settings supplied.
Let us have a look at the test system, at the next page.
 |
||
| Hardware | Test system |
|
| Motherboard | ECS AMD690GM-M2 | |
| Processor | AMD Athlon 64 X2 5400+ | |
| Graphics card | Radeon HD 2900 XT | |
|
Reference sytem 1
|
Reference sytem 2
|
|
| Processor | Gigabyte GA-P35-DQ6 | Abit IP-95 |
| Motherboard | Intel Core 2 Duo X6800 | Intel Core 2 Duo X6800 |
| Graphics card | Radeon HD 2900 XT | VIA Unichrome |
| Memory | Crucial Ballistix PC5300 (D9GMH) | |
| Storage | Hitachi HDT725032VLA630 | |
| Power supply | OCZ Powerstream 520W | |
| Software | ||
| Operating system | Windows XP MCE (SP2) | |
| Chipset drivers | Intel 8.1.1.1010 | |
| Graphics drivers |
ATI Catalyst 7.3 |
|
| Benchmarks |
3DMark 2001SE |
|
We’re going to go through the list of programs in a second, but first our mandatory overclocking page. This time however, we’ve chosen to cut it down a bit because of the following reasons: First, the pricing of the motherboard, second, the size of the motherboard and last but not least, this motherboard doesn’t exactly brag about its overclocking features, does it? Without further delay, let’s have a look at the board’s overclocking capability.
[Editor’s note: This is the BIOS from Spring, recent updates adds better overclocking settings and support.]
Overclocking is something we hold dear here. If there is free performance to gain, we will certainly try to collect it. Even with motherboards like ECS AMD690GM-M2, nothing is sacred. As you could see from our short BIOS walkthrough the conditions aren’t among the best. You perhaps remember that the graphics circuit can be overclocked, but this is not something we will focus upon.
We will use SuperPi 1.5 as the primary benchmark on the overclocking side of things, as this puts load on both memory and processor, even if the scores aren’t comparable between different processor architectures.
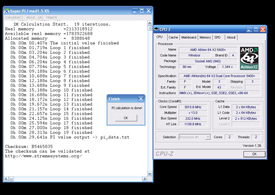
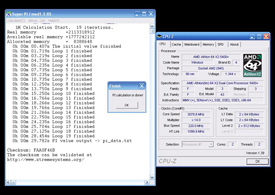
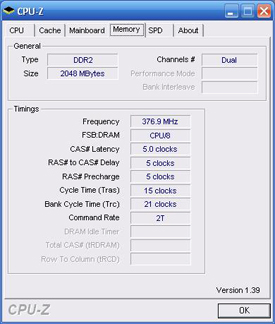
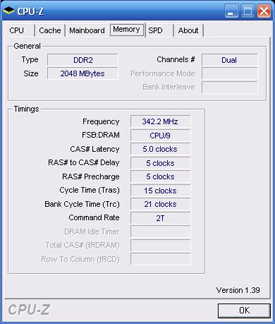
Enough about this, let’s rock. We start by trying out the highest possible settings in BIOS, namely 232MHz HTT, with some not so good results. We quickly realized that we had tried to 232×14, which would’ve resulted in 3248MHz. 232×13 worked just fine. We gathered our thoughts and tried something more feasible with the x14 multiplier, in the form of 220MHz HTT, and this worked just fine, despite no real CPU voltage setting. 220×14 results in 3080MHz, and this clock frequency is completely stable, to our great surprise. Below you can see the increase in performance in SuperPI when going from stock to 3080MHz. 232×13 also worked well, which resulted in 3016MHz.
|
SuperPi 3015MHz
|
SuperPi 3080MHz
|
 |
 |
 |
 |
Because of a shortage of real reference systems, we’ve chosen to test the graphics chipset against a VIA Unichrome chipset of the Abit IP-95 (which also made by ECS, equipped with a VIA P4M890 chipset). That’s why we start off by comparing what should be the most interesting part to compare, namely graphics performance. We thought that any more recent versions than 3DMark 2001 would be worthless to even try to run, why we chose this version.
As you clearly can see, the X1250 chipset integrated into the ECS AMD690GM-M2 outright kicks VIA Unichrome butt, but on the other hand the results aren’t exactly impressive with under 6000 points on standard frequencies, which just isn’t enough for any game today. Just for fun, we overclocked the IGP to the maximum 500MHz available in BIOS, which gave us an almost cute boost in 3DMark 2001, although you won’t notice it in any games of today.
Furthermore, we’ve compared the motherboard against something as unfair as a high-end rig consiting of Gigabyte’s GA-P35-DQ6 and an Intel Core 2 Duo X6800, the results are as shown below.
As you can see, the overclock of 280MHz does give you a relatively big boost, and the performance isn’t exactly surprisingly a bit worse than the Core 2 Duo system, although it costs a whole lot more.
WinRAR is as you may know an application that benefits from high memory bandwidth, and the K8 architecture’s integrated memory controller should do just this well. With 1102kB/s at 3080MHz, it’s not trailing the GA-P35-DQ6 by far.
The only thing this test does is to measure the latency to your RAM in nanoseconds (ns), and as you clearly can see, AMD’s integrated memory controller does well in this test. Sadly, this doesn’t automatically come with monstruous memory performance as you’ll need some big bandwidth to get somewhere as well. The bandwidth seems to be AMD’s problem, especially with the WinRAR results in mind.
Our comparisons might not be exactly fair either, but the fact is that ECS and AMD does impress, costing a fifth of the reference system, giving you almost the same performance. Would you decide to start overclocking the Core 2 Duo system you would see the AMD system trailing by far very quickly though, it has to be said.
Conclusion next.
In the beginning this board was a pain to deal with, as it didn’t want to cooperate with the Catalyst 7.4 drivers no matter what, with bluescreens as a result. We reverted to the 7.3, and away went the bluescreens. This was later confirmed by ECS tech staff, that there was a problem with the 7.4 drivers, why we chose to run with the 7.3 throughout the testing. [Editor’s note: the driver problems are related to the chipset and not this particular board.]
The possibility to connect two screens directly to your integrated graphics processor is surely a feature that will be held in high regard by many, and the image quality is in usual ATI style, namely very good. Then there’s a feature to overclock the IGP via BIOS, which of course adds for a fun feature, although it’s not exactly necessary as the chipset isn’t good enough for any games no matter what the frequencies.
Summing everything up, this is a relatively good package for your buck, although a less messy BIOS would’ve been preferable, and at the same time you would probably have wanted another pair of memory slots for future use. But the upsides are still there; four SATA ports, one IDE channel, all passive cooling and a somewhat reasonable layout makes this a motherboard that should fit every man’s HTPC.
|
|
|
ECS AMD690GM-M2
|
|
Pros Cons |
We want to point out that the above criterias are related to the pricing, four SATA ports in this price range has to be considered a pro.
Lastly, we would like to thank ECS for supplying us a test sample, while they are telling our Swedish readers that the motherboard is available at Datorbutiken.









ya man